I bought the best thing in the world for $20 at Walmart, and this may be the first time I have bought anything cheap that actually works as intended.
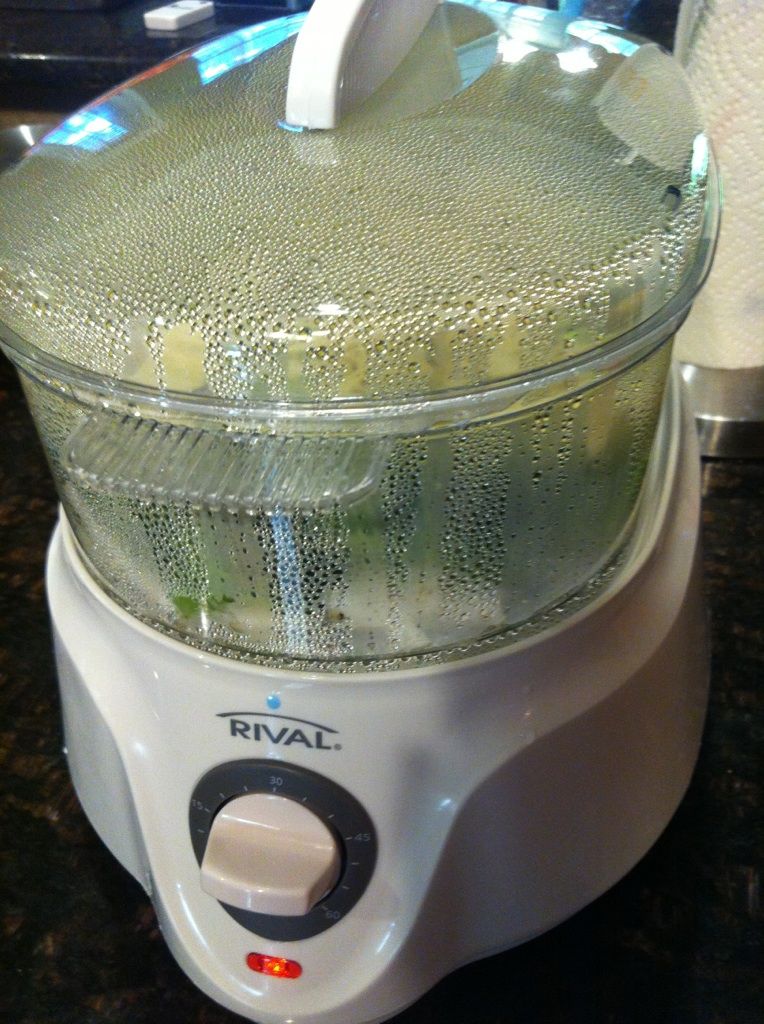
Rival Double Stack Vegetable Steamer - it's cheap and a little thin. It does not have all of the bells and whistles that the more expensive models have. It works!!!! Most important for me.
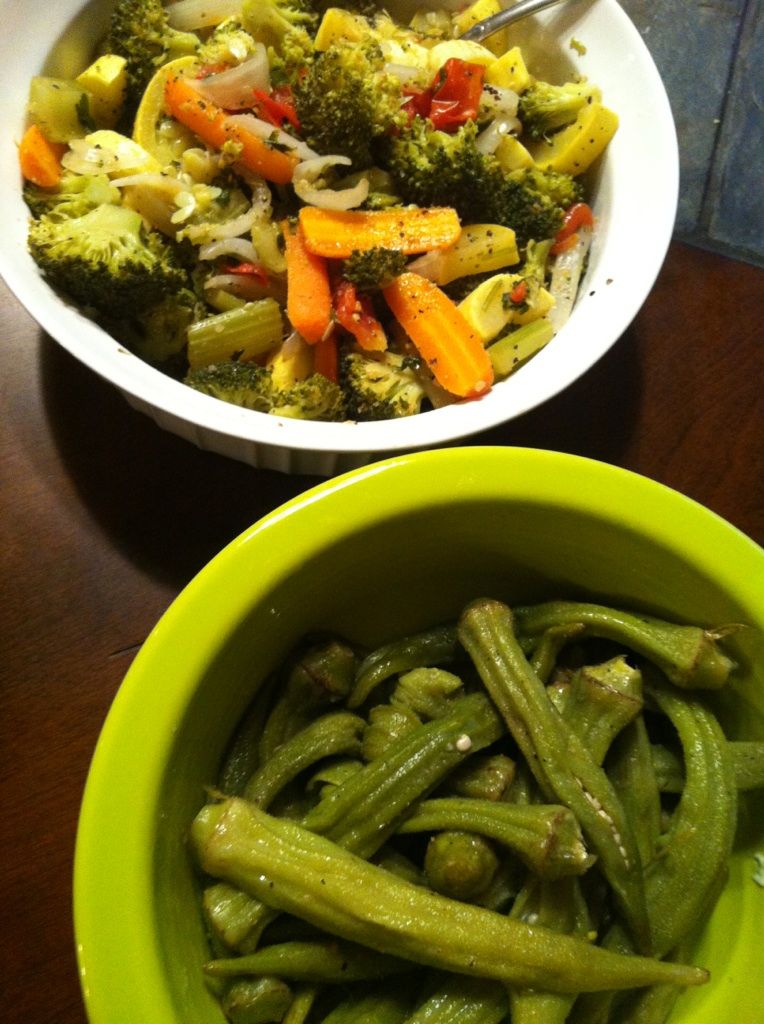
This is why it is worth it to me. This was my dinner. I put all of this in the steamer. About 25 minutes and Bam! Done! I added a spoonful of butter and tossed the okra. A little salt and everything was so yummy. You just throw some vegetables together and some Ms. Dash. Put it in there, and it comes out amazing.
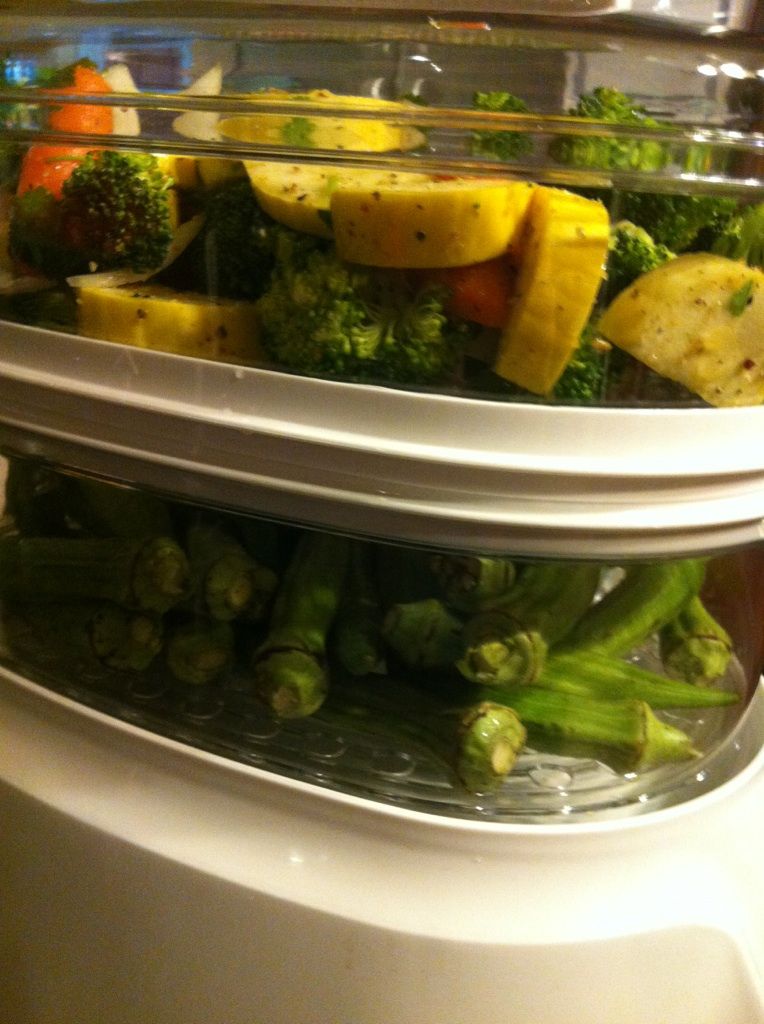
Here is what it looked like stacked before I turned it on. This picture is before I figured out that my stacking seals were stuck together. It still cooked wonderful. Fool Proof!
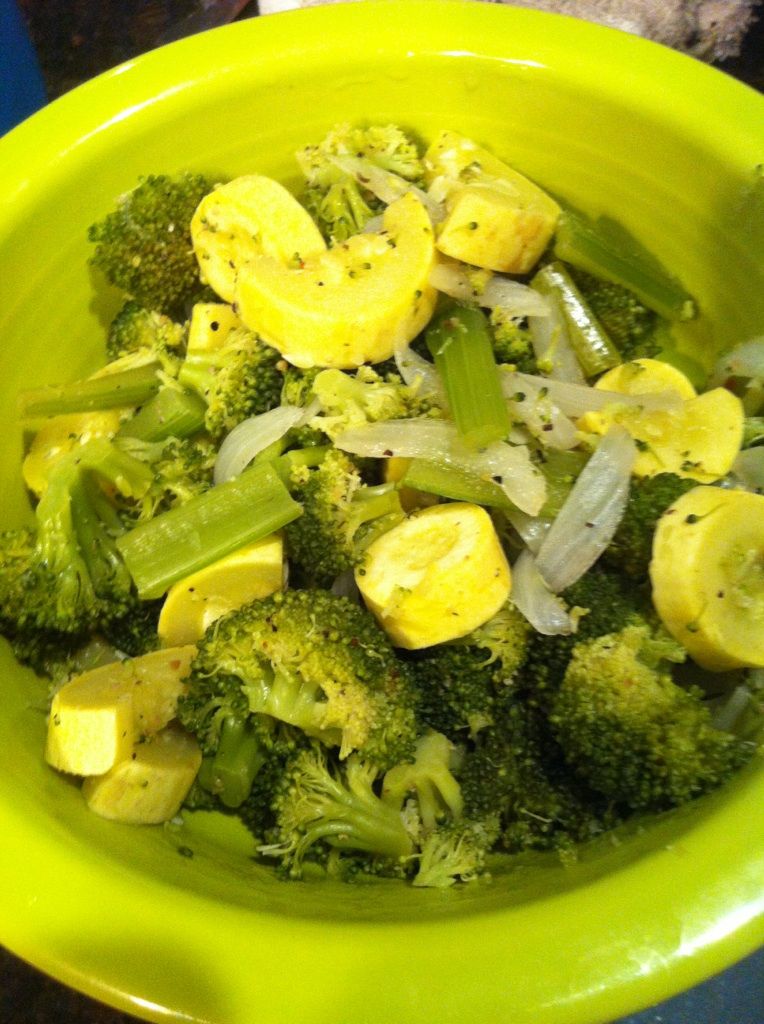
More food pictures for you. This was the first time I tried it. Broccoli, Squash, Celery, Onion, Ms. Dash. I ate every bit of it.
This is what it looked like while it was cooking. Like I say, I didn't have the stacking seal on it, and it still cooked up great. This is using only one layer of cooking.
Look at the vibrant color of the finished food. It is not cooked to death and has plenty of flavor. You can toss with some olive oil and salt or nothing at all.
This may be the best $20 I have spent in a long time. This is especially the best time of year to find something like this with all of the fresh vegetables around. I do plan on cooking some meats in it, too. I am also wondering if tamales are an option.
Sunday, July 15, 2012
Saturday, July 07, 2012
Anderson Creek Soap is live
It's official; my Etsy shop is now open. http://www.etsy.com/shop/AndersonCreekSoap
I have been making soap for awhile now. Everyone always asks me if I am selling it. Up until now, I have only been giving it to my friends and family. As I started making different kinds, I have found a few recipes that I really love.
I am selling two kinds of soap at the moment. Oatmeal, Milk & Honey Cocoa Butter Soap and Ginger Papaya Mango Butter Soap. More to be added soon!
If you want to keep up with my progress, I have created a blog specific to my soap vending. http://andersoncreeksoap.blogspot.com/
I also have a Facebook page if you want to go "Like it." http://www.facebook.com/AndersonCreekSoap
I have been making soap for awhile now. Everyone always asks me if I am selling it. Up until now, I have only been giving it to my friends and family. As I started making different kinds, I have found a few recipes that I really love.
I am selling two kinds of soap at the moment. Oatmeal, Milk & Honey Cocoa Butter Soap and Ginger Papaya Mango Butter Soap. More to be added soon!
If you want to keep up with my progress, I have created a blog specific to my soap vending. http://andersoncreeksoap.blogspot.com/
I also have a Facebook page if you want to go "Like it." http://www.facebook.com/AndersonCreekSoap
Tuesday, May 29, 2012
Soap currently on the curing table plus lip balm
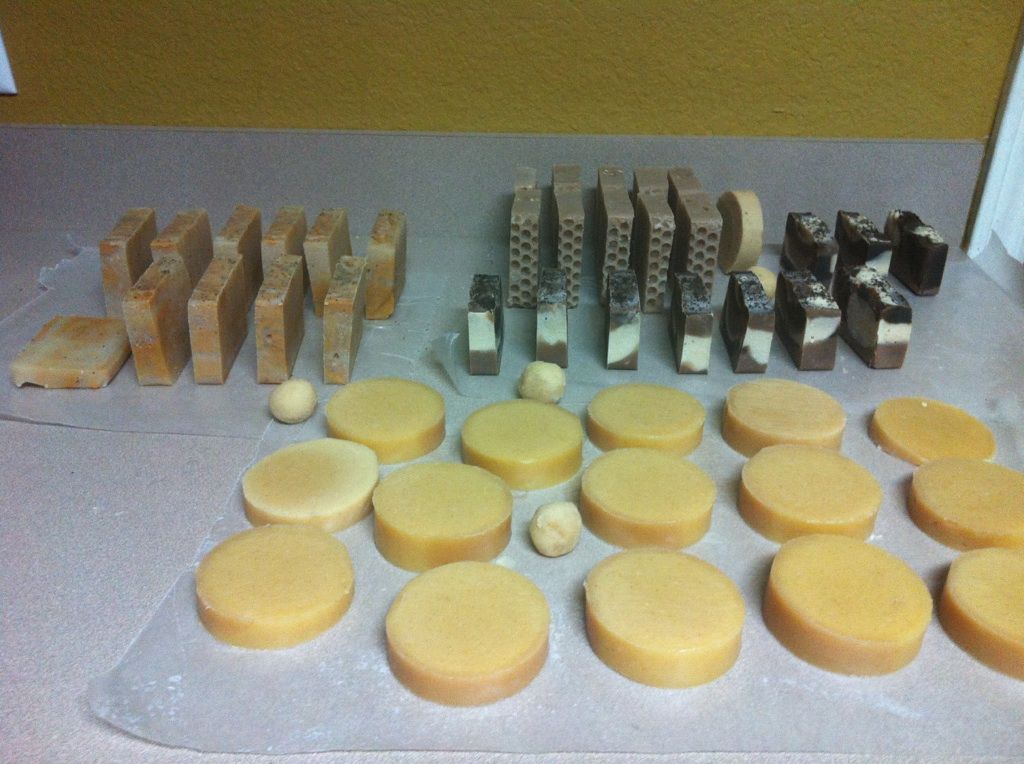
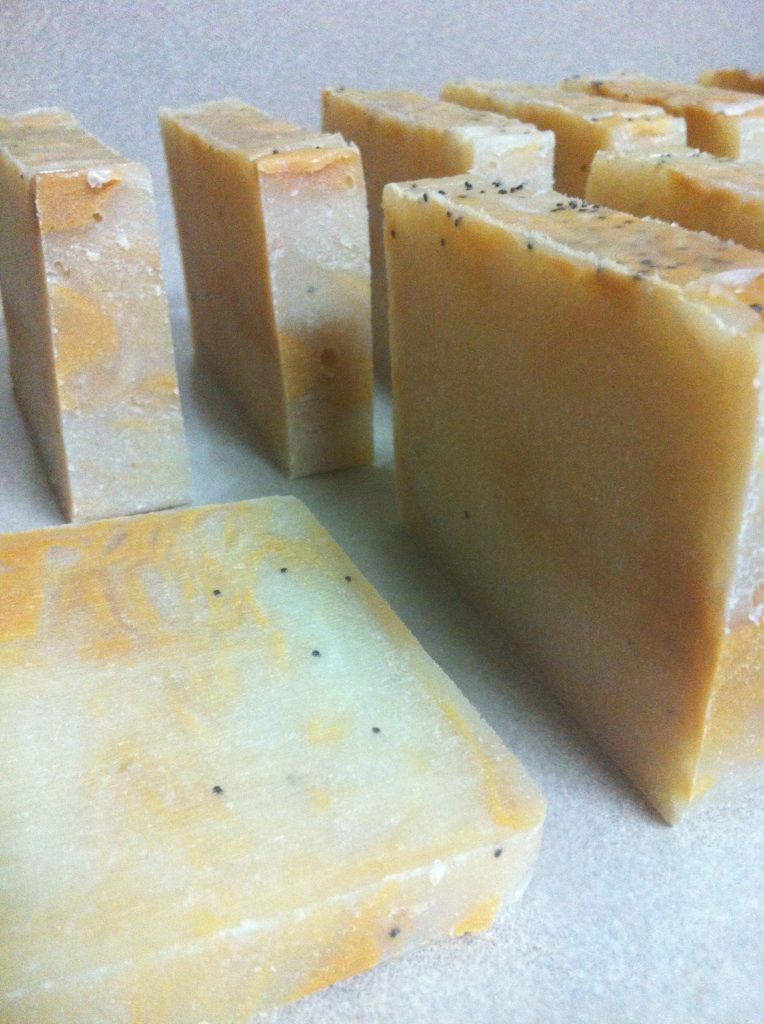
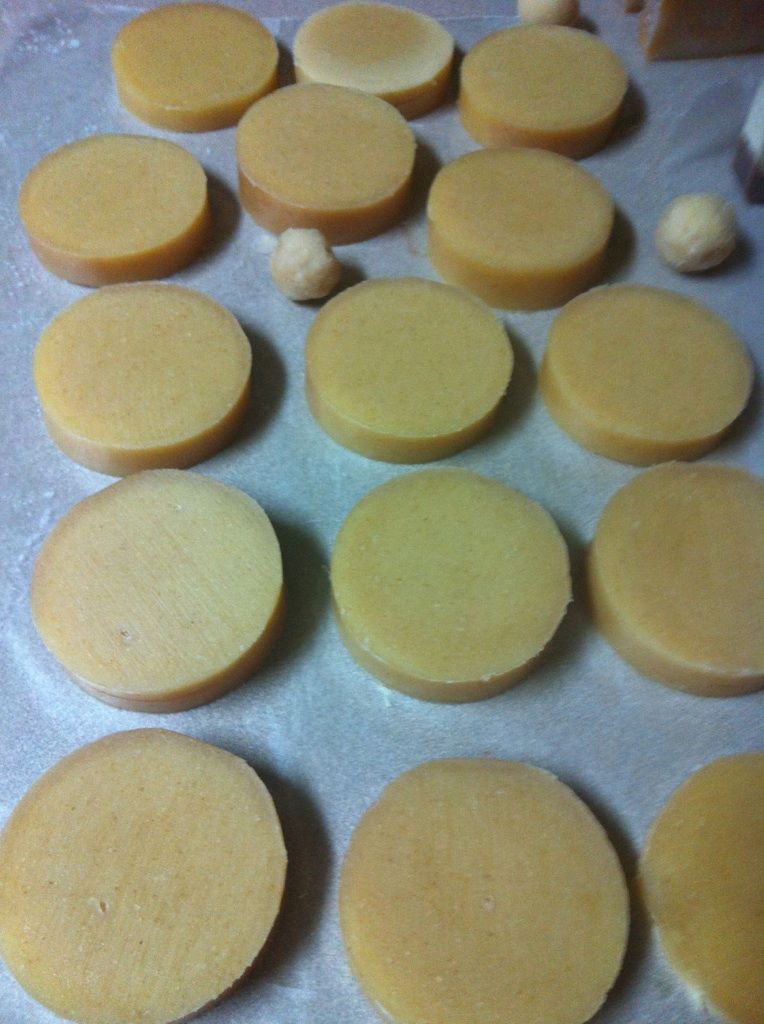
As of right now, this is what is curing on my table. I still have some of the Oatmeal, Milk, and Honey soap in the back. You can tell because it has a honeycomb texture.
I decided that I would share my soaping experiences good or bad so others can use it to their benefit in their soaping journeys.
One of the prettiest soaps I have done so far is the soap I will probably call Mocha Cappuccino Cocoa Butter Soap pictured below. Only a little over 2 pounds.
It is made with brewed coffee, cocoa butter, cocoa powder, etc. The smells are chocolate, vanilla, and coffee grounds sprinkled on top. You can't really tell exactly what a soap will smell like until it has finished curing. Experimenting with colors and swirls.
It does look like a manly soap with rich, strong scents. I had a light bit of ash form on the top. That is always a stinker because it doesn't happen right away, usually the second or third day. I haven't had ash problems for some time. Hmmm
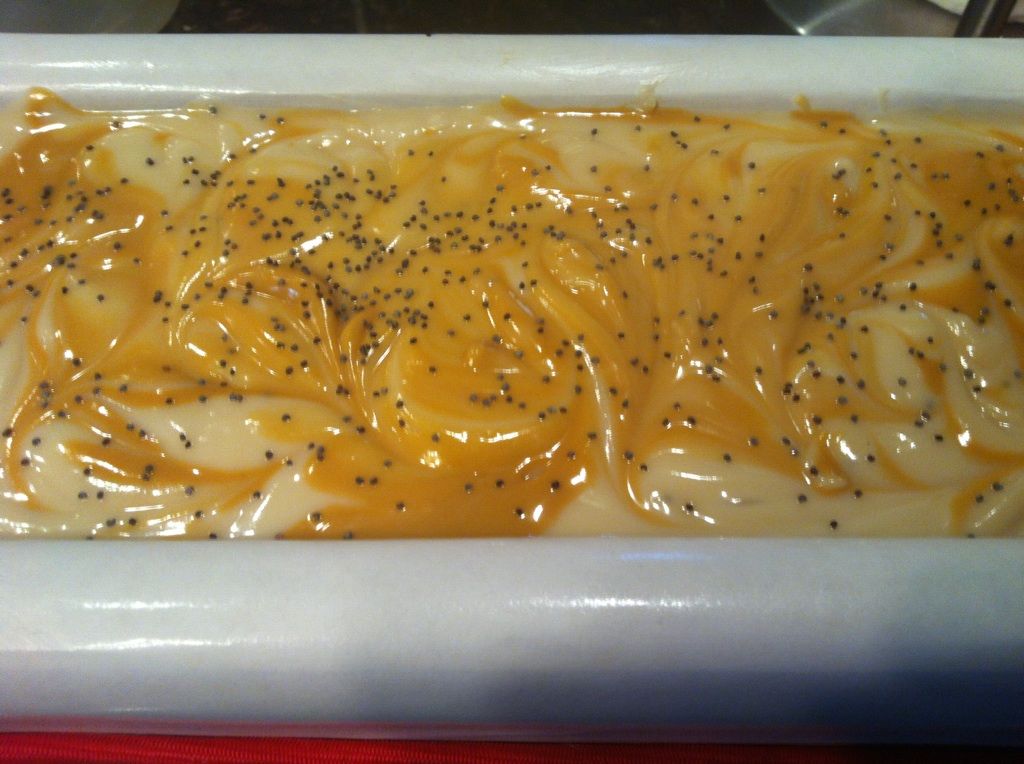
This is some Ginger Papaya with Mango Butter and sprinkles of poppy seeds. About 2.5 pounds. I was experimenting with color and swirls again. It is good to learn different techniques such as mixing in the pot or in the mold. This smells amazing. It was quite stout in the bottle but mellowed just enough in the soap.
My saran wrap stuck to the top, and I did not get the top I was hoping for although it still looks good. This color will change even further as it cures. I suspect that the soap will lighten a bit as the water evaporates.
Not as impressive since there was some noticeable gelling discoloration on the sides. This is only cosmetic. Whenever I use a PVC mold, I always get a little different color at the bottom inch or so. I use a goat milk so I do not insulate. This soap was Frankincense & Myrrh Goat Milk Soap. This was 2 pounds. There is also ground oatmeal in this soap. This is much better than my first attempt at Frankincense & Myrrh soap. It was horrible and smelled like playdough. I threw it out because it stunk so bad.
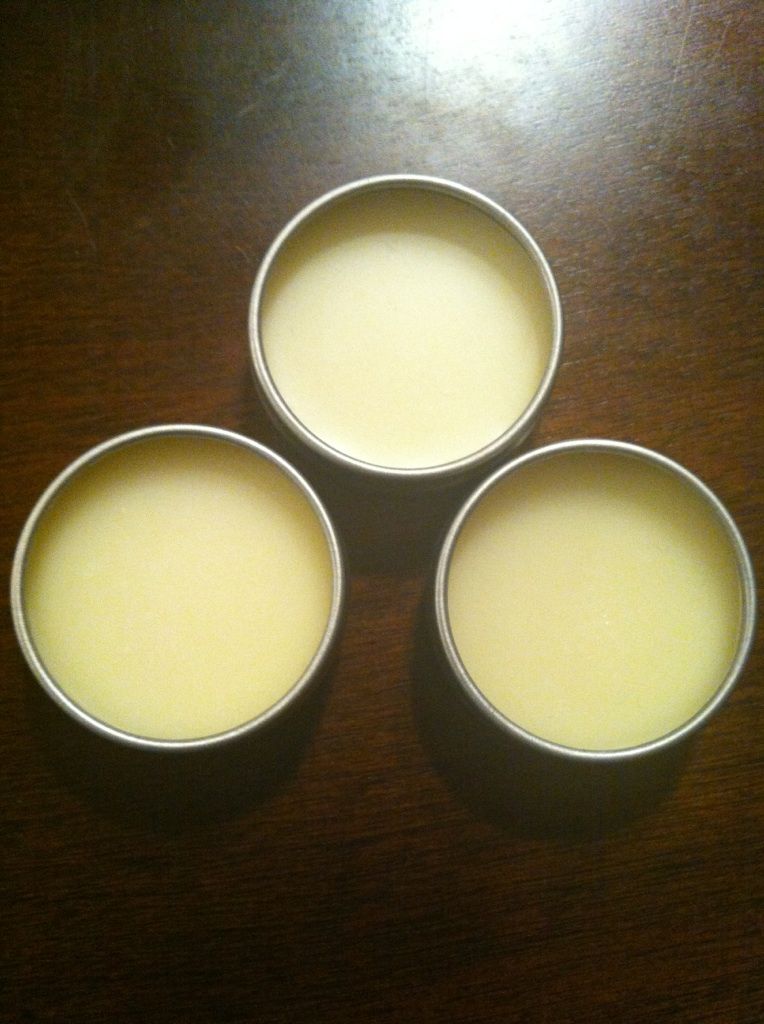
Here is a bonus! I made some Coco-Rosey Lip Balm the other day found at Crunchy Betty's blog. You can tell that I have been using the bottom right one already. It is not bad. I think the recipe needs improving. The first time I made it, it did not harden or set up. I had to reheat and add a tablespoon of beeswax to it. After viewing the comments, I could see that other people had problems as well. I live in Texas, and it is summer. Coconut Oil is not going to stay hardened in our climate anytime of the year. I infused the oil with dried rosebuds. After I use it for an extended time, I will let you know how it is. I like anything that smells like cocoa butter.
In a week or so, I am going to be teaching someone to make soap. I am excited to pass this on to others.
I decided that I would share my soaping experiences good or bad so others can use it to their benefit in their soaping journeys.
One of the prettiest soaps I have done so far is the soap I will probably call Mocha Cappuccino Cocoa Butter Soap pictured below. Only a little over 2 pounds.
It is made with brewed coffee, cocoa butter, cocoa powder, etc. The smells are chocolate, vanilla, and coffee grounds sprinkled on top. You can't really tell exactly what a soap will smell like until it has finished curing. Experimenting with colors and swirls.
It does look like a manly soap with rich, strong scents. I had a light bit of ash form on the top. That is always a stinker because it doesn't happen right away, usually the second or third day. I haven't had ash problems for some time. Hmmm
This is some Ginger Papaya with Mango Butter and sprinkles of poppy seeds. About 2.5 pounds. I was experimenting with color and swirls again. It is good to learn different techniques such as mixing in the pot or in the mold. This smells amazing. It was quite stout in the bottle but mellowed just enough in the soap.
My saran wrap stuck to the top, and I did not get the top I was hoping for although it still looks good. This color will change even further as it cures. I suspect that the soap will lighten a bit as the water evaporates.
Not as impressive since there was some noticeable gelling discoloration on the sides. This is only cosmetic. Whenever I use a PVC mold, I always get a little different color at the bottom inch or so. I use a goat milk so I do not insulate. This soap was Frankincense & Myrrh Goat Milk Soap. This was 2 pounds. There is also ground oatmeal in this soap. This is much better than my first attempt at Frankincense & Myrrh soap. It was horrible and smelled like playdough. I threw it out because it stunk so bad.
Here is a bonus! I made some Coco-Rosey Lip Balm the other day found at Crunchy Betty's blog. You can tell that I have been using the bottom right one already. It is not bad. I think the recipe needs improving. The first time I made it, it did not harden or set up. I had to reheat and add a tablespoon of beeswax to it. After viewing the comments, I could see that other people had problems as well. I live in Texas, and it is summer. Coconut Oil is not going to stay hardened in our climate anytime of the year. I infused the oil with dried rosebuds. After I use it for an extended time, I will let you know how it is. I like anything that smells like cocoa butter.
In a week or so, I am going to be teaching someone to make soap. I am excited to pass this on to others.
Sunday, May 06, 2012
Sunday Relaxing
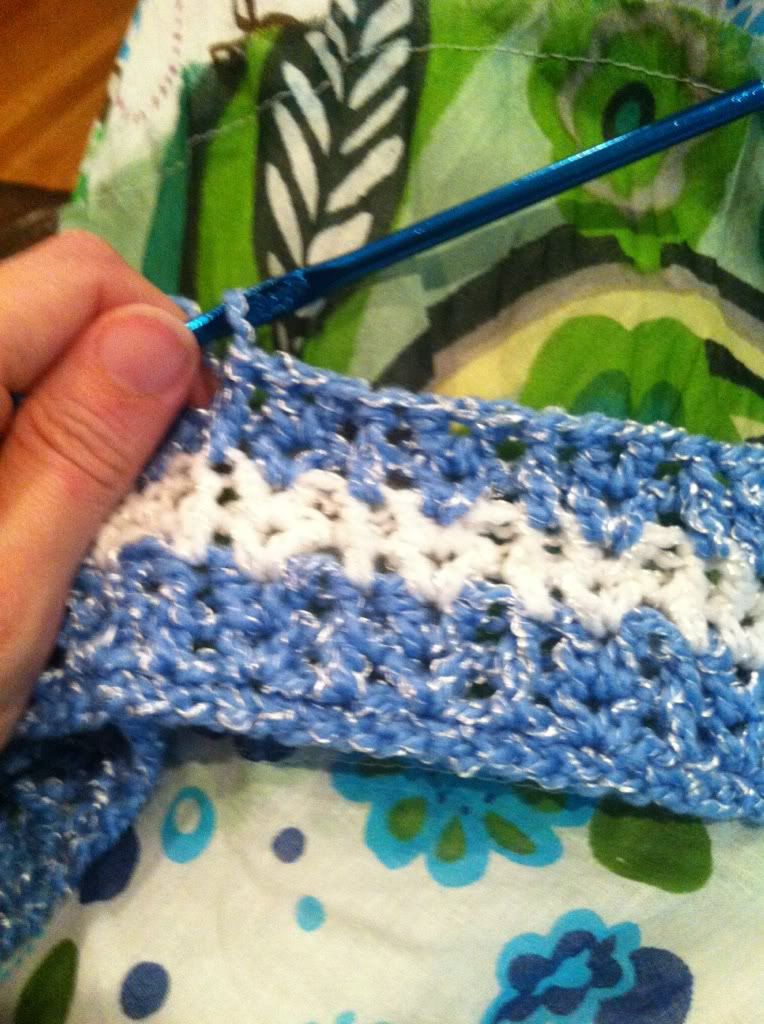
Having fun a few hours before evening church. Crocheting. I haven't crocheted in around 2 years. I can't believe it has been that long.
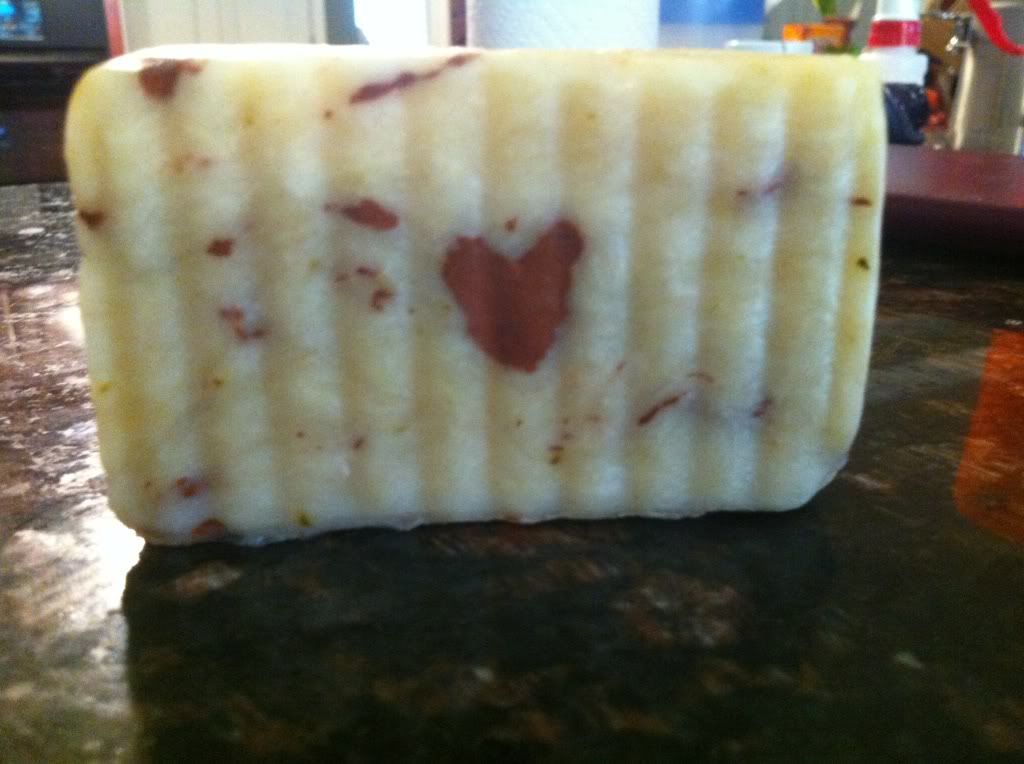
The other day I was washing my hands with some of my homemade soap, and I found LOVE in it. Ha ha
Thursday, May 03, 2012
Frankincense and Myrrh soap
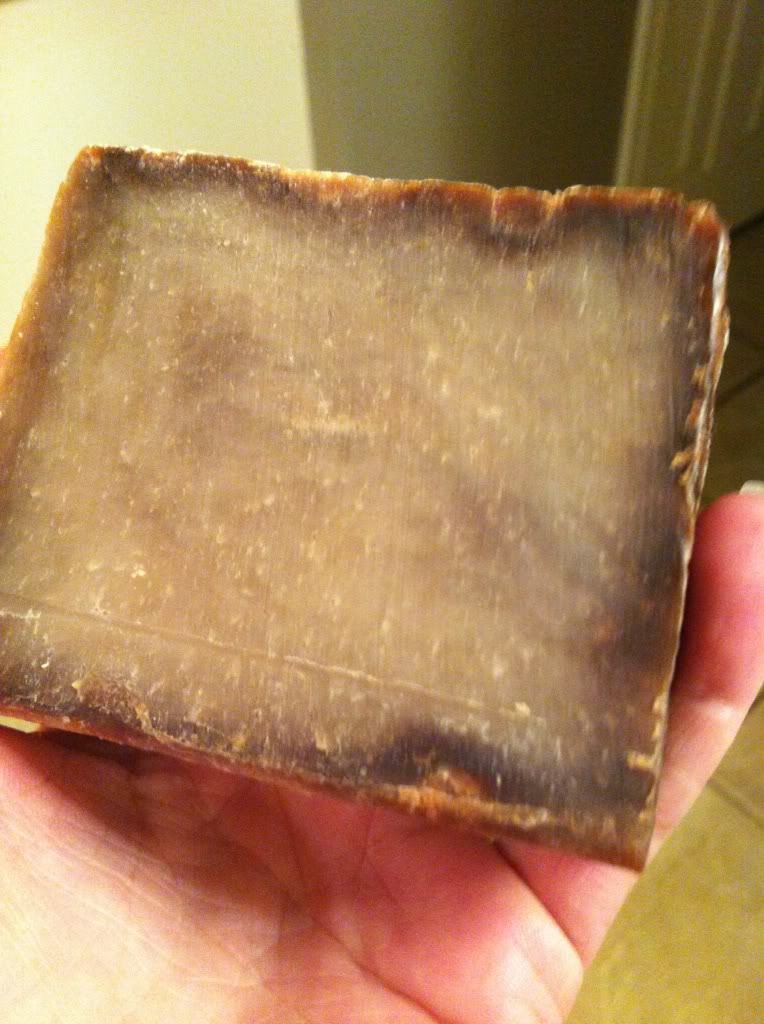
Even though I make soap, I buy this soap, Frankincense & Myrrh (organic) from Charlene at the Bathhouse Soapery & Caldarium in Hot Springs, Arkansas.
This soap is one of my favorite soaps from her shop. It has nice darkened edges and reminds me of being aged. The smell is not like any other Frankincense & Myrrh that I have ever smelled.
It is so pretty that I had to share. :)
This soap is one of my favorite soaps from her shop. It has nice darkened edges and reminds me of being aged. The smell is not like any other Frankincense & Myrrh that I have ever smelled.
It is so pretty that I had to share. :)
Sunday, April 29, 2012
Oatmeal, Milk & Honey soap is what's up
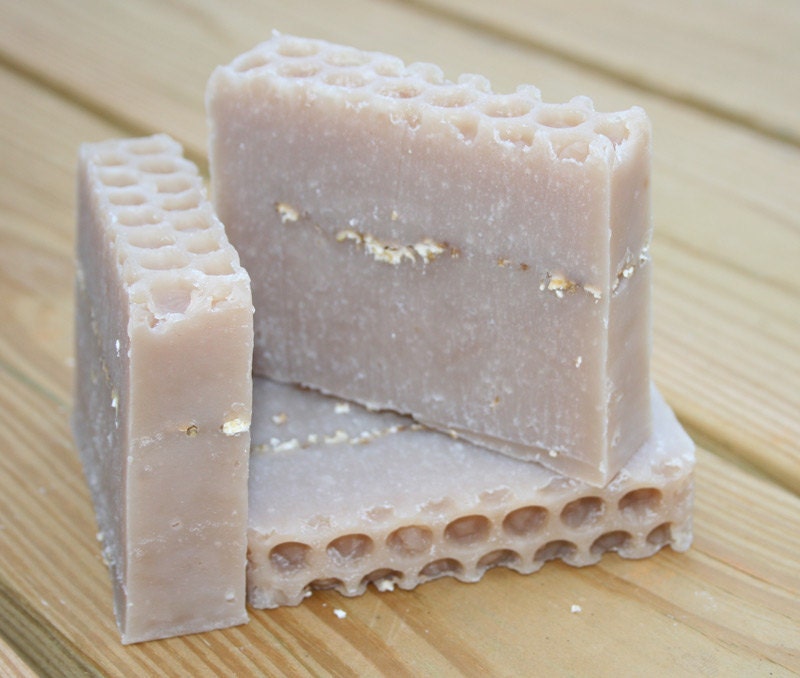
I have been filling my soap curing table up in the last few weekends. My latest creation combined a few things I have been wanting to try - the honeycomb pattern and the oatmeal in the middle. I used a very popular fragrance oil: Oatmeal, Milk & Honey that can be purchased from Brambleberry.
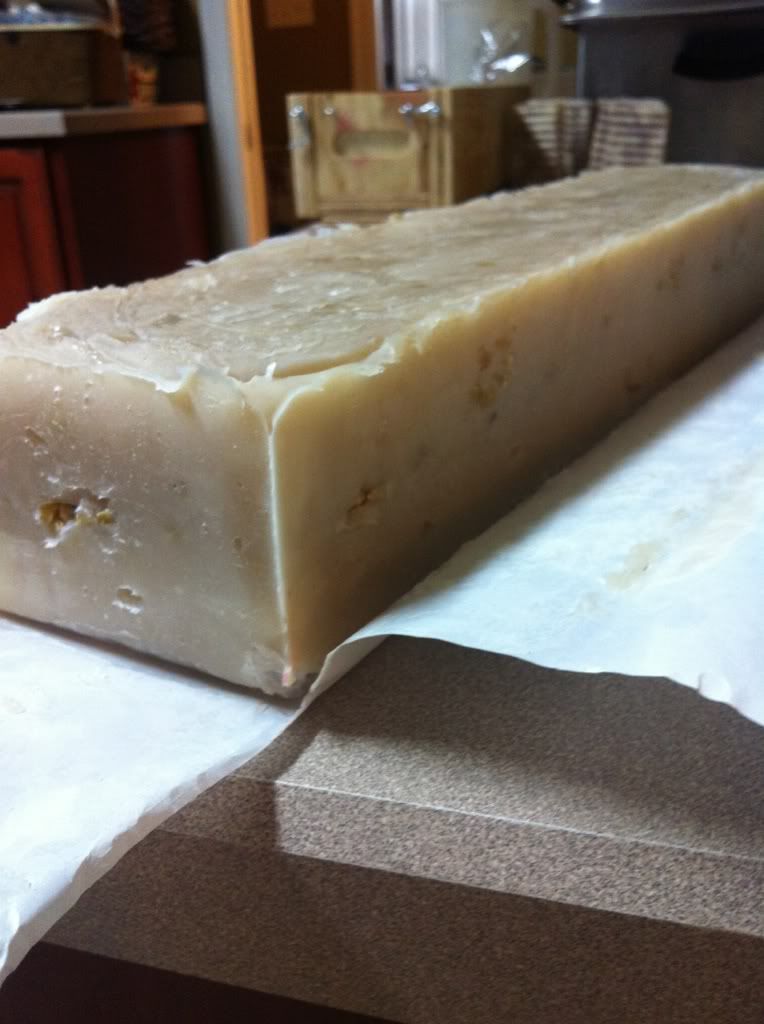
I just unwrapped this 5 pounds of cold process soap today and cut it. It is still very soft and needs 4 weeks to cure. The color will change a bit over the 4 weeks, and it will shrink a tiny bit. This is a blend of oils I worked up when I started making my Chocolate Mint Spa Soap. It has a good proportion of coconut oil in it and cocoa butter as my moisturizer.
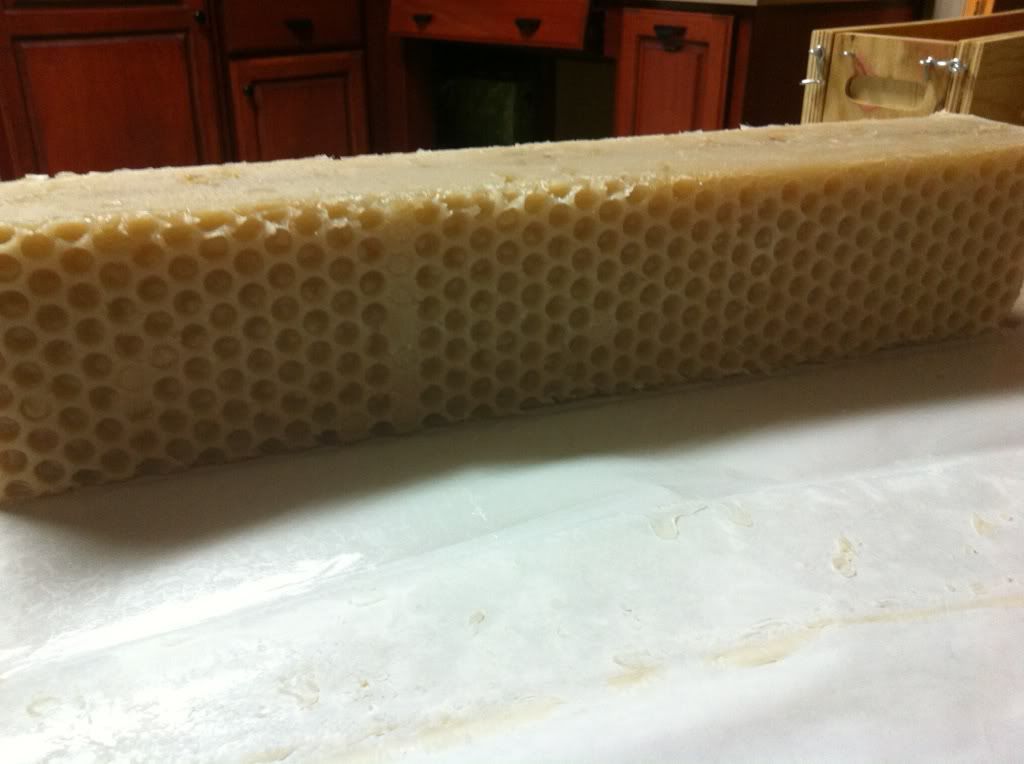
This is the soap on its side. You can see that I put the bubble wrap on the bottom of the mold and poured right on top of it. You just easily peel the bubble wrap off and you get this neat design. There is a layer of oatmeal in the middle of the soap.
This is once I first pulled the freezer paper away from the sides. It was just poured yesterday. Untouched and uncut.
Here is what I had curing before this weekend. Pictured in the back: (cold process/hot process) Orange Patchouli Coconut Milk. Round pieces are cold process Apple & Peach Cobbler Goatmilk soap with raspberry seeds. My favorite that is curing towards the front is a cold process/hot process Creamy Coconut soap. I specially formulated it for my mother-in-law with mostly Coconut Oil, coconut milk, and mango butter.
I just unwrapped this 5 pounds of cold process soap today and cut it. It is still very soft and needs 4 weeks to cure. The color will change a bit over the 4 weeks, and it will shrink a tiny bit. This is a blend of oils I worked up when I started making my Chocolate Mint Spa Soap. It has a good proportion of coconut oil in it and cocoa butter as my moisturizer.
This is the soap on its side. You can see that I put the bubble wrap on the bottom of the mold and poured right on top of it. You just easily peel the bubble wrap off and you get this neat design. There is a layer of oatmeal in the middle of the soap.
This is once I first pulled the freezer paper away from the sides. It was just poured yesterday. Untouched and uncut.
Here is what I had curing before this weekend. Pictured in the back: (cold process/hot process) Orange Patchouli Coconut Milk. Round pieces are cold process Apple & Peach Cobbler Goatmilk soap with raspberry seeds. My favorite that is curing towards the front is a cold process/hot process Creamy Coconut soap. I specially formulated it for my mother-in-law with mostly Coconut Oil, coconut milk, and mango butter.
Thursday, April 05, 2012
Back at the banjo
It's been awhile since I posted. I have made 3 videos in the past few weeks that are of clawhammer banjo playing.
If you have a minute or two and want to catch up, here you go!
This song is called Cluck Old Hen. It's an older sounding song played clawhammer style. Played on Deering Goodtime Openback Banjo.
Here is a clawhammer version of Cripple Creek for the bluegrass lovers.
Last but not least. Blackberry Blossom played Clawhammer style.
I would also like to plug my favorite banjo maker, Chuck Lee. One of these days I will have one of his handcrafted banjos to play for you. :) He is a real nice guy who lives in Ovilla, TX and makes the best darn banjos around. I have had the pleasure of talking with him and playing one of his banjos at the Acoustic Music Camp in Arlington, TX. His son, Nate Lee, is an amazing mandolin/fiddle player. I have heard him play there in Arlington a few years, Overton Bluegrass Festival, and CampBluegrass in Levelland, TX many moons ago.
Monday, February 20, 2012
Jeans to skirt and hair flower
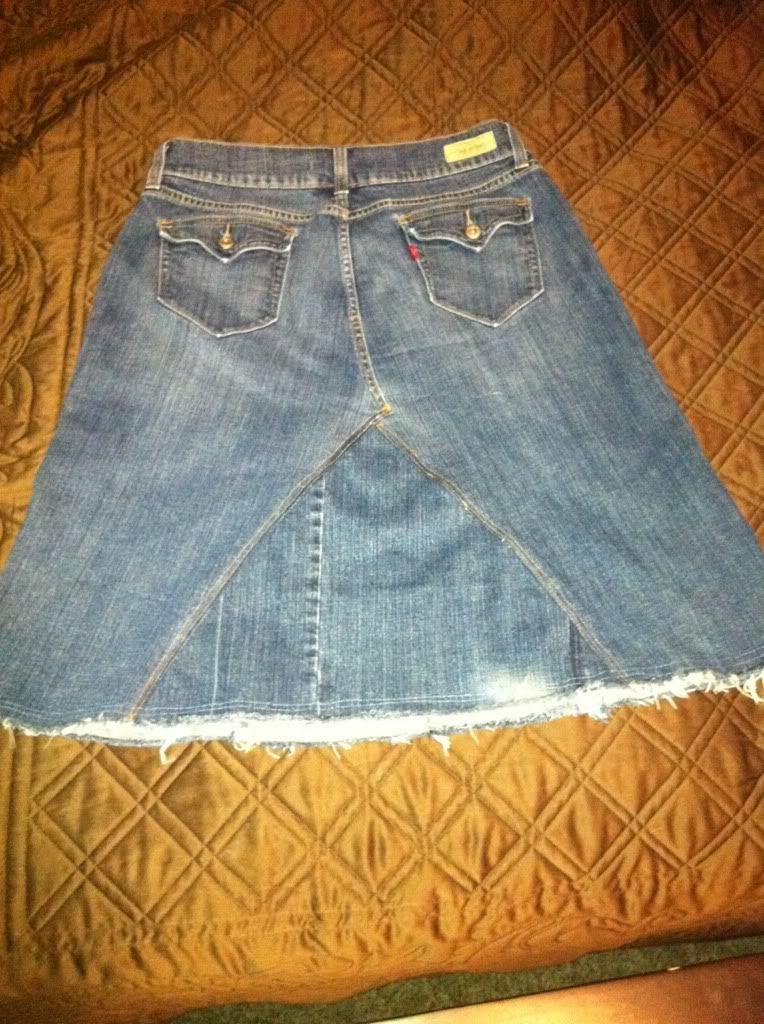
I needed some skirts to wear and love denim, but good jean skirts seem hard to find when you are looking for them. I had older Levis pants. I was so intimidated by ripping out the inside seam in the jeans. Once I got started, it wasn't so bad.
It is an A-line skirt. I trimmed the bottom off and pieced in the panel. I frayed the edge and ran two lines of stitches above where I cut it so it won't fray past that part.
It has turned out to be one of my most comfortable skirts now. Didn't cost anything since I used what I already had.
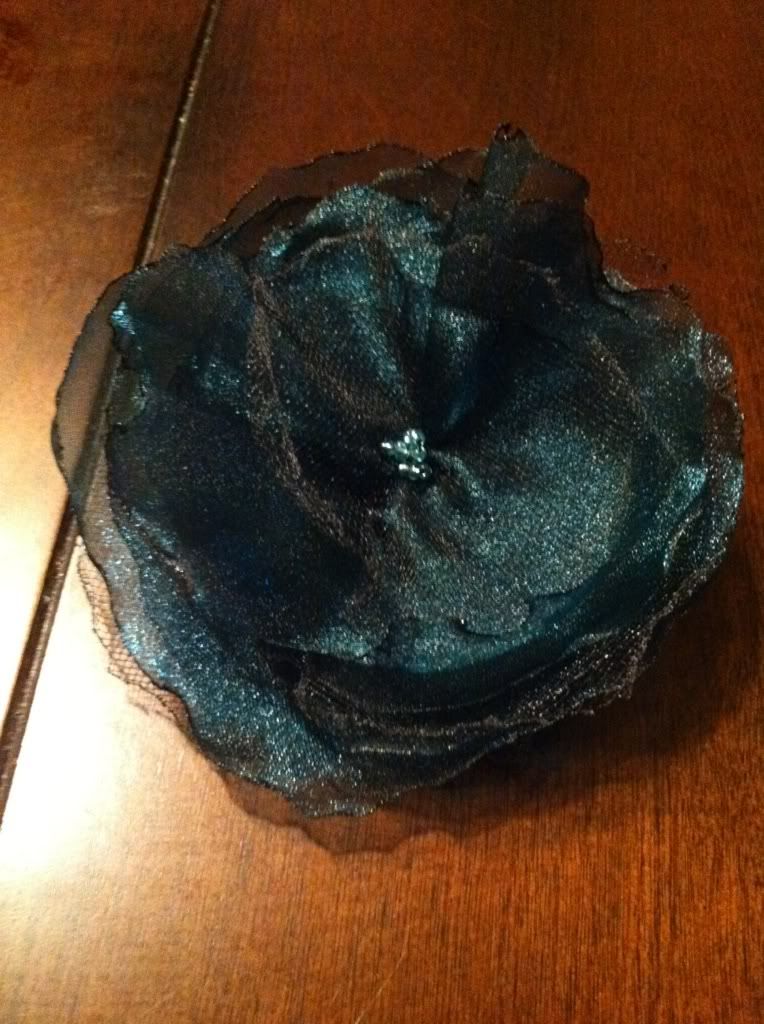
I also decided on a whim today that I would like to make some pretty flowers to put in my hair. I saw some for sale but knew I could create them cheaper and more unique. I got some tulle, organza, felt, and alligator clips at Hobby Lobby today. I already had some seed beads. It was fun.
Warning: Bad quality cell phone pics! :)
It is an A-line skirt. I trimmed the bottom off and pieced in the panel. I frayed the edge and ran two lines of stitches above where I cut it so it won't fray past that part.
It has turned out to be one of my most comfortable skirts now. Didn't cost anything since I used what I already had.
I also decided on a whim today that I would like to make some pretty flowers to put in my hair. I saw some for sale but knew I could create them cheaper and more unique. I got some tulle, organza, felt, and alligator clips at Hobby Lobby today. I already had some seed beads. It was fun.
Monday, January 30, 2012
Plucco is not so little
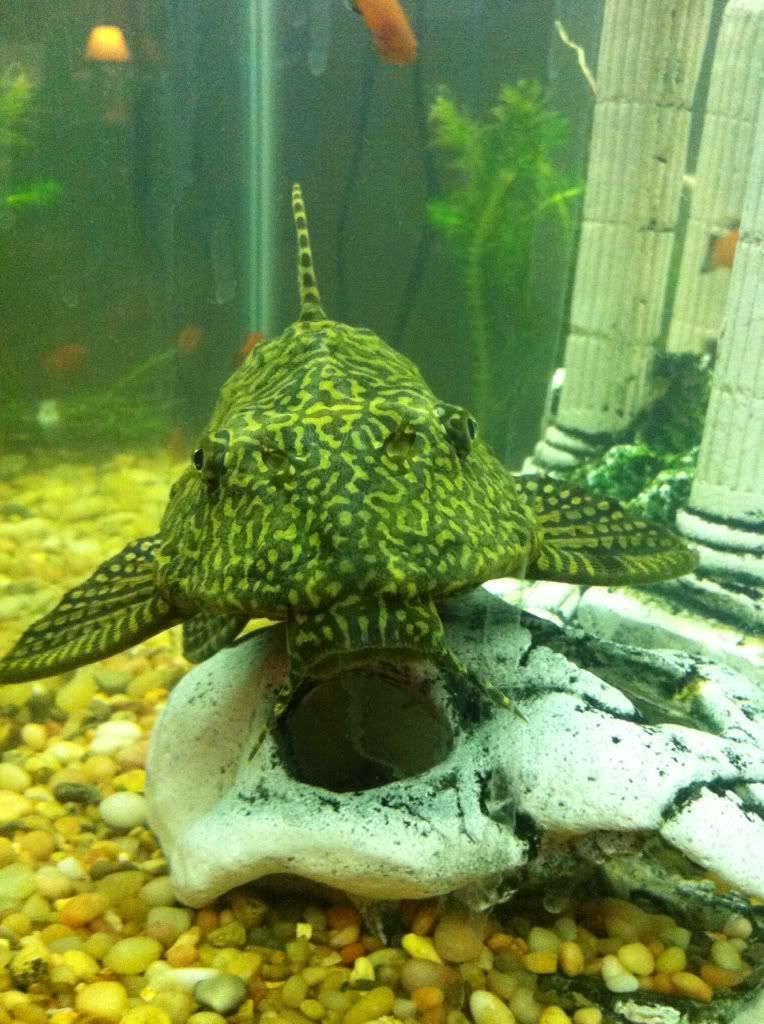
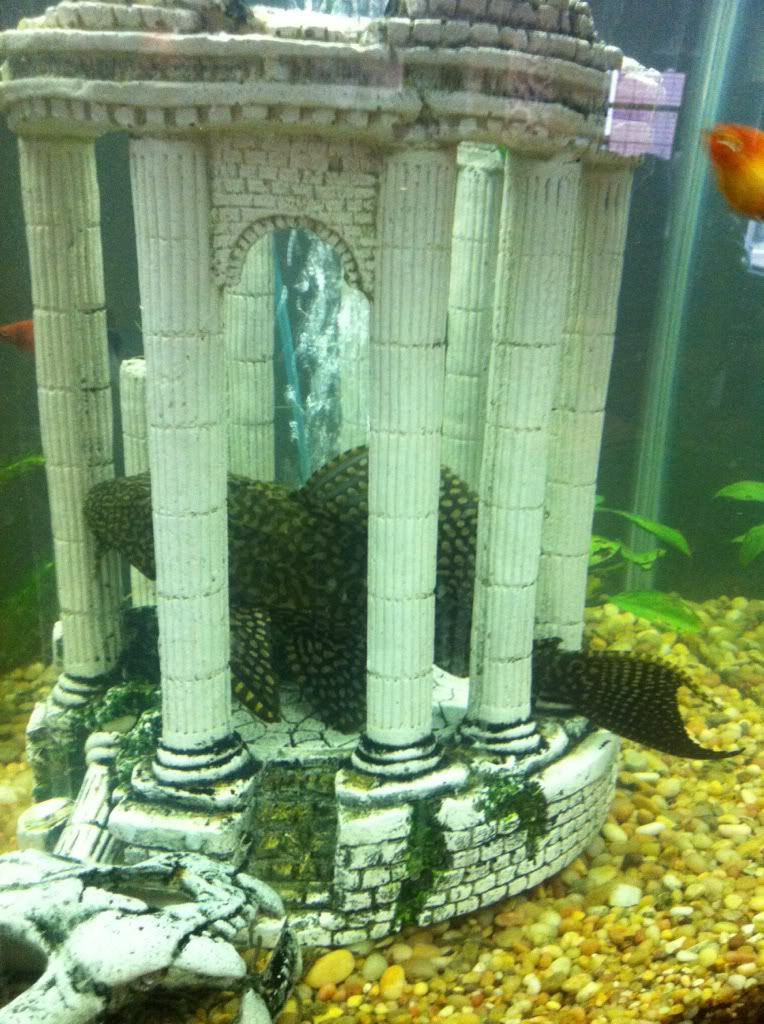
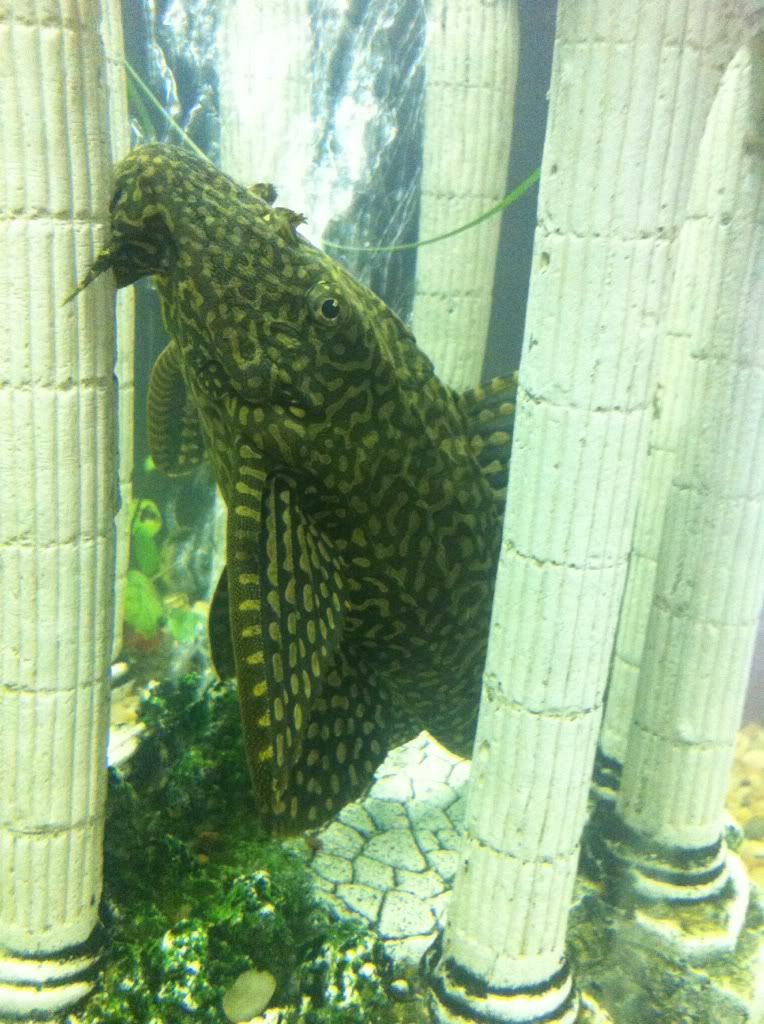
This Plecostomus has become the star of our tank. He is a few years old and eats wafers everyday. Our tank is 47 gallons and vertical. He is getting so big that some of our decor is having to come out.
You can see that the plecostomus is probably 12 inches long now. He looks stuck in the colosseum, but he's not. I have removed some of the extra fake greenery and other things so that he can lay on the gravel.
He is so large that when I am on the couch staring at him, I am sure that he is staring back at me. I do not handle him, but I have read that some people like to do that. I am not that brave. It is becoming harder to clean the tank and keep him undisturbed. He is graceful and looks like a dragon flying through the water.
When I first got this plecostomus, I thought he was just going to be an algae sucker. He was maybe 1-2 inches long from the pet store. If you feed them wafers and don't allow them to only eat from the tank, they will Flourish!
You can see that the plecostomus is probably 12 inches long now. He looks stuck in the colosseum, but he's not. I have removed some of the extra fake greenery and other things so that he can lay on the gravel.
He is so large that when I am on the couch staring at him, I am sure that he is staring back at me. I do not handle him, but I have read that some people like to do that. I am not that brave. It is becoming harder to clean the tank and keep him undisturbed. He is graceful and looks like a dragon flying through the water.
When I first got this plecostomus, I thought he was just going to be an algae sucker. He was maybe 1-2 inches long from the pet store. If you feed them wafers and don't allow them to only eat from the tank, they will Flourish!
Monday, January 23, 2012
Make your own Peppermint Water
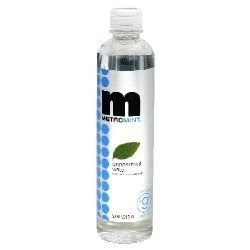
If you like the taste of MetroMint Peppermint Water but do not like the price, you can make your own. I bought some of this water and paid a little over $2.50. Wow Expensive! I saw the ingredients and knew I could make something similar.
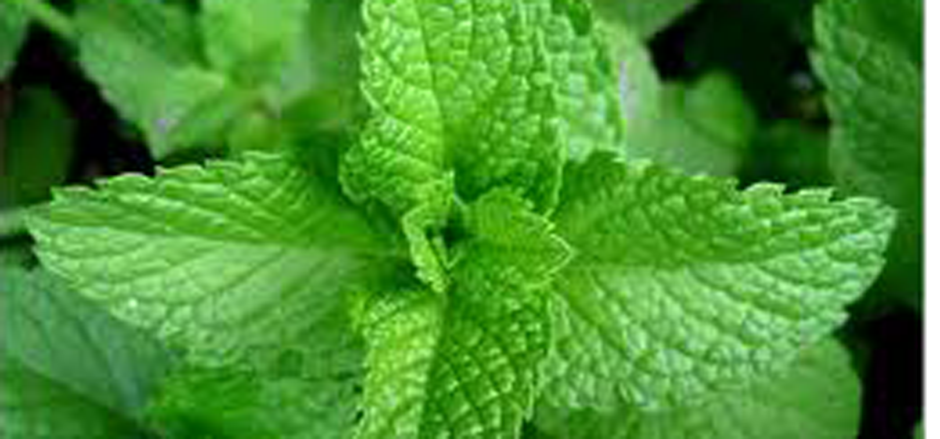
You can add 1-2 drops of Peppermint Essential Oil in a glass of water. That's it. Stir it around and you have peppermint water. You can also steep some peppermint leaves if you wanted to go that route. You can get a small bottle of Peppermint Essential Oil for $4 online.
There is a huge savings to making it yourself, and the health benefits of Peppermint Oil is very long. It can help with digestion, UTI, immunity, and blood circulation among many other things. You can view a great page of info here.
You can add 1-2 drops of Peppermint Essential Oil in a glass of water. That's it. Stir it around and you have peppermint water. You can also steep some peppermint leaves if you wanted to go that route. You can get a small bottle of Peppermint Essential Oil for $4 online.
There is a huge savings to making it yourself, and the health benefits of Peppermint Oil is very long. It can help with digestion, UTI, immunity, and blood circulation among many other things. You can view a great page of info here.
Monday, January 02, 2012
Revisited Scented Pine Cones, Orange Slices
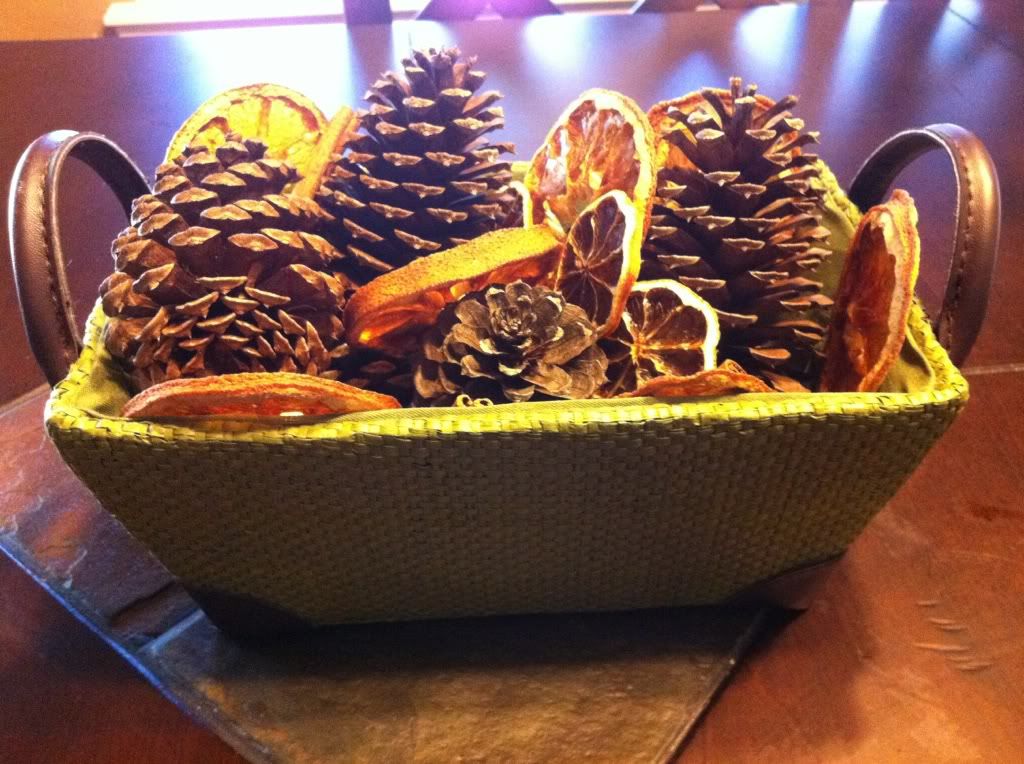
I made a blog post back at the beginning of November telling how I was making the scented pine cones, orange slices, and lemon slices. They smelled really good and were supposed to sit for several weeks. I got all caught up in the holidays at Thanksgiving and forgot about them until now.
I pulled them out today and made a small centerpiece for the table and another basket for the fireplace. They had some cinnamon sticks in them as well. They smell wonderful and the dehydrated slices turned out nice.
Wednesday, December 28, 2011
Thieves Oil to the rescue
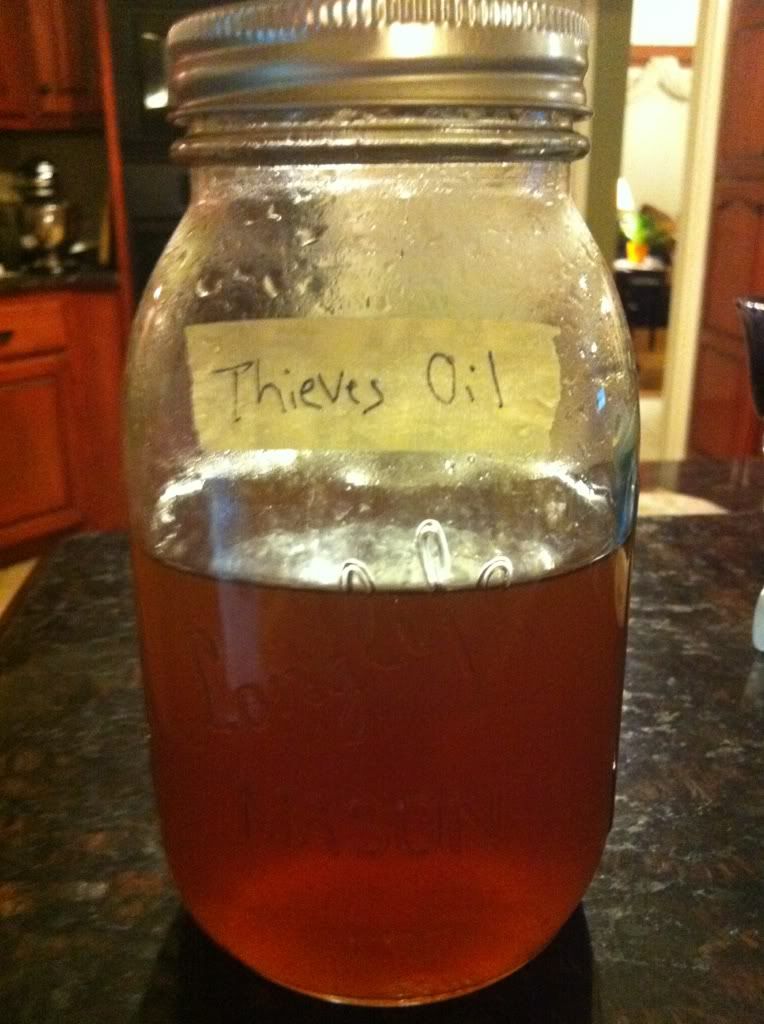
I had never heard of Thieves Oil until this past year. I started dabbling in essential oils and making cleaners. I heard this word come up several times. So, the best resource I found for easy DIY instructions was Ma & Pa Parker's Sustainability Blog. There is some history to Thieves Oil that you should look up. It's interesting. It helped the robbers of Medieval times fight off the plague so they could rob the dead without getting ill and dying.
You can find the recipe there on their blog. I had to make some variations because of what I had.
Thieves Oil (My substitutions to the side.)
1 lemon peel (20 drops Lemon EO)
4 Sprigs of Rosemary (I grew mine this year)
4 Cinnamon Sticks (18 drops Cinnamon EO)
1/4 cup Whole Cloves
7 drops Eucalyptus EO
Bring 1 Quart of water and all of the hard items to a boil. Cover and simmer for 30 minutes. Remove from heat and let cool. Stir Often. Strain into Quart Jar and add the Essential Oils. The picture of mine above is after I have used it several times.
What can you do with this? I use it to mop with and fight off nasty flu and germs. I pour a little (1/4 cup) into some hot water to mop with. It smells really good because of the Cinnamon and Cloves. If it is good enough to kill the plague, it should work for everyday flu.
On Ma & Pa's blog, they tell how you can use it for a General Purpose Cleaner, Glass Cleaner (mixed with vinegar), Wood Cleaner (Polish), and Laundry Additive. Make sure to find out how to mix these things before you use it. Some things can be damaging if not known how to properly use.
Friday, December 23, 2011
DIY Foot Soak
I haven't been to get a pedicure in 2 years. Last few times I went, they cut me pretty deep or injured me somehow. I decided to just pamper myself at home.
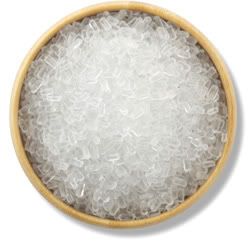
I used a large dishpan and filled it half-full with really hot water. I put about 1/4 cup Epsom salts, 1/4 cup baking soda, a few drops of Rosewood Essential Oil, and a small handful of dried Rose Petals. It was super relaxing. By using Epsom Salts, you will absorb Magnesium through your skin. See more benefits here at SaltWorks.
I got to soak my feet and watch some TV at my couch. How cool. I put all of my pedicure tools in a small bucket so they would be available while I was soaking. Don't forget to have a towel handy! I finished up with some great Shea Butter Lotion for my feet, cuticle oil, and some fuzzy socks.
So, I saved myself $40 dollars plus Tip. I will probably never go back to a Nail Salon for a pedicure.
I used a large dishpan and filled it half-full with really hot water. I put about 1/4 cup Epsom salts, 1/4 cup baking soda, a few drops of Rosewood Essential Oil, and a small handful of dried Rose Petals. It was super relaxing. By using Epsom Salts, you will absorb Magnesium through your skin. See more benefits here at SaltWorks.
I got to soak my feet and watch some TV at my couch. How cool. I put all of my pedicure tools in a small bucket so they would be available while I was soaking. Don't forget to have a towel handy! I finished up with some great Shea Butter Lotion for my feet, cuticle oil, and some fuzzy socks.
So, I saved myself $40 dollars plus Tip. I will probably never go back to a Nail Salon for a pedicure.
Thursday, November 03, 2011
Curry Hot and Sour Soup, a crock-potting tale
Perfect day today for a good crock-pot soup. I wanted to try and make a Hot and Sour soup because I had never made one. I also love curry and Thai. Mix of 2 recipes. Fabulous.
I am so excited to say that I have now cooked Tofu. Shame on me for not doing it sooner. And after watching Forks over Knives, thank you Michelle, I feel proud.
Here is a basic run-down of how I did it. It happened throughout the day, but I will spare you all the scatter-brain details.
Curry Hot and Sour Soup
Ingredients:
I started off with frozen chicken breasts and dumped a carton of chicken broth over it. I let it cook for a few hours (probably 4) on high. After awhile, you can see it boiling and know it needs to be pulled out to cube or chop up. If you aren't worried about cloudy broth, which I am not, I throw the meat back in to cook with everything else.
Then, I started adding everything in as I chop it. No need for too much prep. I added the 2 cups of water, the Red Wine Vinegar (Rice Wine Vinegar may be more traditional but that is what the Cooper Cupboards had), Soy Sauce, Curry Powder, Brown Sugar, red pepper, jalapeno, carrot (I wouldn't have peeled them if they were organic), celery, red bell pepper, cabbage, garlic, wild mushrooms, bamboo shoots, and water chestnuts. Let that cook up for about 2-3 hours. Depending on how hot your crock pot gets, you will want to monitor that.
Throw the last few ingredients in at the last and let it get good and hot. The flavor of the cilantro really adds a flavor punch mixed with the curry mix.
I couldn't get enough of it. The flavor was so good. It was definitely the best comfort food I have had in awhile. This was too spicy for my 17 year old daughter, and too weird for my picky 13 year old son, but my little buddy D ate this right up and kept saying "Bite Bite" after each bite. He really dug the broth.
I am so excited to say that I have now cooked Tofu. Shame on me for not doing it sooner. And after watching Forks over Knives, thank you Michelle, I feel proud.
Here is a basic run-down of how I did it. It happened throughout the day, but I will spare you all the scatter-brain details.
Curry Hot and Sour Soup
Ingredients:
- 2 chicken breasts
- carton of chicken broth
- 3 TB Red Wine Vinegar
- 2 TB Soy Sauce
- 2 tsp curry powder
- 2 cups water
- 2 TB Brown Sugar
- 1/2 tsp crushed red pepper flakes
- 1 tsp chopped Jalapeno
- 1 carrot, peeled and sliced
- 1 celery stalk
- 1/2 Red Bell Pepper
- 1/4 cup or handful of shredded cabbage
- 1/2 box firm tofu, bite sized cubes
- 1 tsp chopped garlic
- 1/3 cup wild mushrooms (frozen or dried for my area)
- 1/2 can Bamboo Shoots, drained
- 1/2 can Water Chestnuts, drained
- -----------------------------
- 3-4 green onions, green tops
- 1 TB chopped cilantro
I started off with frozen chicken breasts and dumped a carton of chicken broth over it. I let it cook for a few hours (probably 4) on high. After awhile, you can see it boiling and know it needs to be pulled out to cube or chop up. If you aren't worried about cloudy broth, which I am not, I throw the meat back in to cook with everything else.
Then, I started adding everything in as I chop it. No need for too much prep. I added the 2 cups of water, the Red Wine Vinegar (Rice Wine Vinegar may be more traditional but that is what the Cooper Cupboards had), Soy Sauce, Curry Powder, Brown Sugar, red pepper, jalapeno, carrot (I wouldn't have peeled them if they were organic), celery, red bell pepper, cabbage, garlic, wild mushrooms, bamboo shoots, and water chestnuts. Let that cook up for about 2-3 hours. Depending on how hot your crock pot gets, you will want to monitor that.
Throw the last few ingredients in at the last and let it get good and hot. The flavor of the cilantro really adds a flavor punch mixed with the curry mix.
I couldn't get enough of it. The flavor was so good. It was definitely the best comfort food I have had in awhile. This was too spicy for my 17 year old daughter, and too weird for my picky 13 year old son, but my little buddy D ate this right up and kept saying "Bite Bite" after each bite. He really dug the broth.
Tuesday, November 01, 2011
Scented Pine Cones, Orange Slices
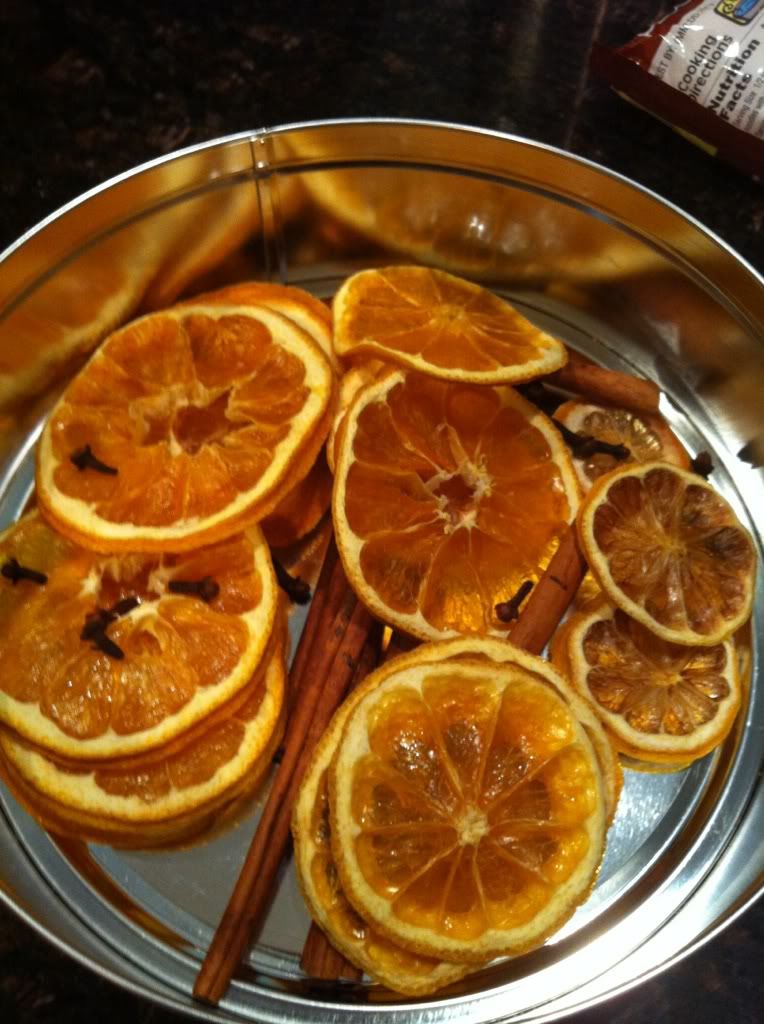
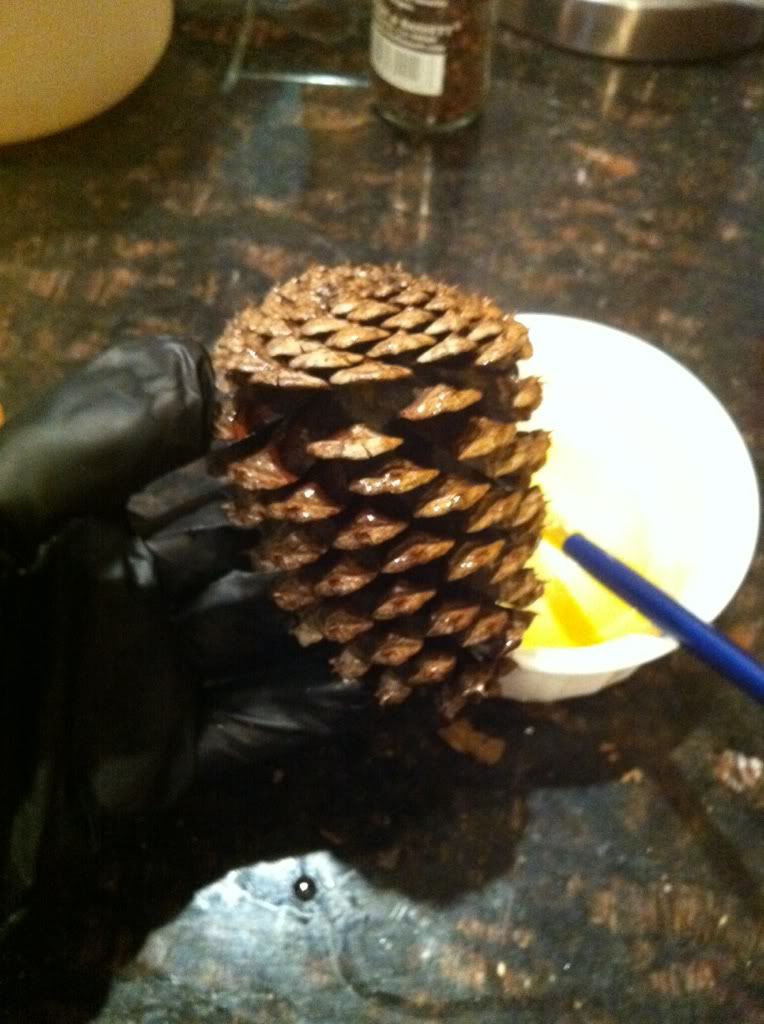
Several weeks back, we collected pine cones from the yard and set off to make scented pine cones and other holiday items. I used my dehydrator to dry these orange and lemon slices. I added cinnamon sticks and whole cloves. I then mixed up some essential oils and painted the pieces with a paint brush. I closed them up in this tin canister. They will be ready in a few weeks, Right about time for holiday decorating. You could hang these on a Christmas tree, attach to a package with the tag, spread in a decorative bowl, add with potpourri. Ready in 4-8 weeks.
We filled this basket up with pine cones. Then, I did the same for the pine cones. We got a few pieces of cinnamon sticks to throw in there with them. We made up our oil blend and painted each pine cone. Put it all in a big trash bag. You can shake it every once in awhile. This may help to distribute the scent.
My tips for you that I learned was "Wear Gloves." Pine Cones will stick you. Also, this helps with not getting the strong oils on your hand. Your house will smell good when you make this.
My mom used to keep scented pine cones in a canister before the holidays. I went in search of how to do it. I found a quick article on SnowDrift Farm. Change it up however you want.
We filled this basket up with pine cones. Then, I did the same for the pine cones. We got a few pieces of cinnamon sticks to throw in there with them. We made up our oil blend and painted each pine cone. Put it all in a big trash bag. You can shake it every once in awhile. This may help to distribute the scent.
My tips for you that I learned was "Wear Gloves." Pine Cones will stick you. Also, this helps with not getting the strong oils on your hand. Your house will smell good when you make this.
My mom used to keep scented pine cones in a canister before the holidays. I went in search of how to do it. I found a quick article on SnowDrift Farm. Change it up however you want.
Wednesday, October 26, 2011
Who can resist the curing table?
This is the funnest part of making soap. The curing. It is a pretty slow process, but you get to see your soap turn into a nice looking bar. In the beginning, sometimes it looks pretty scary. Colors change. Fragrances change, sometimes not for the best. You never know how it will really turn out until the very end.
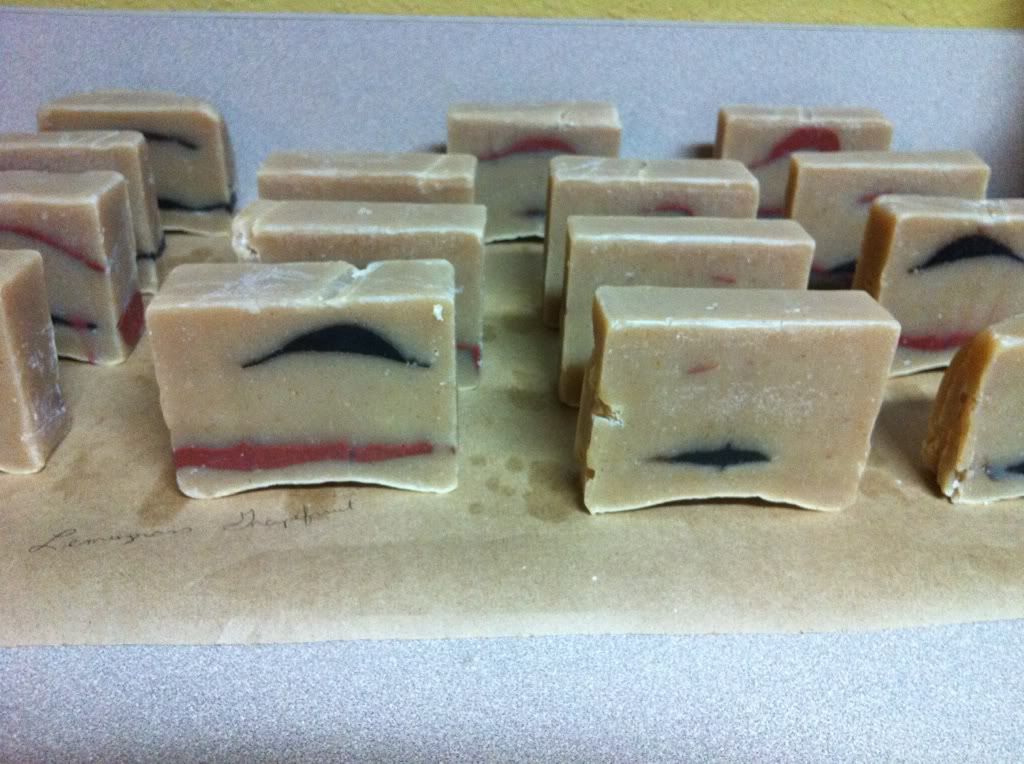
The soap you see above was cold process and then oven processed. It will be ready in 4 days. This soap was made many days ago.
No one can resist walking by curing soap and touching it.
The soap you see above was cold process and then oven processed. It will be ready in 4 days. This soap was made many days ago.
No one can resist walking by curing soap and touching it.
Tuesday, October 11, 2011
Buffalo Wing Jerky - Dehydrator
I really enjoy some homemade jerky. Once you get used to eating it, you never want to buy any from Wal-Mart again. Our friend (Jonathan) told my husband a few years ago that he started making some Buffalo Wing Jerky. Mmm You don't need any exact measurements to make jerky. It tastes awesome if you just follow basic instructions and add what you want.
First, you need to get a roast. Really any roast will do. You need to cut off any major fat so the leaner the better. The last roast we used was a Rump Roast. It is usually around $10.Cut it across the grain if you can. The pieces that are cut across the grain will fall apart more easily. The ones with the grain will be tougher to chew. To each their own.
I cut my meat with a cheaper electric meat slicer that I picked up from Wal-Mart one holiday. You can get it at Amazon as well. It folds up and is pretty easy to use. It is a booger to clean because it does come apart into about 4 pieces. You will find little pieces of meat in cracks, but it does come clean. If you keep your box, it stores nice in a closet.
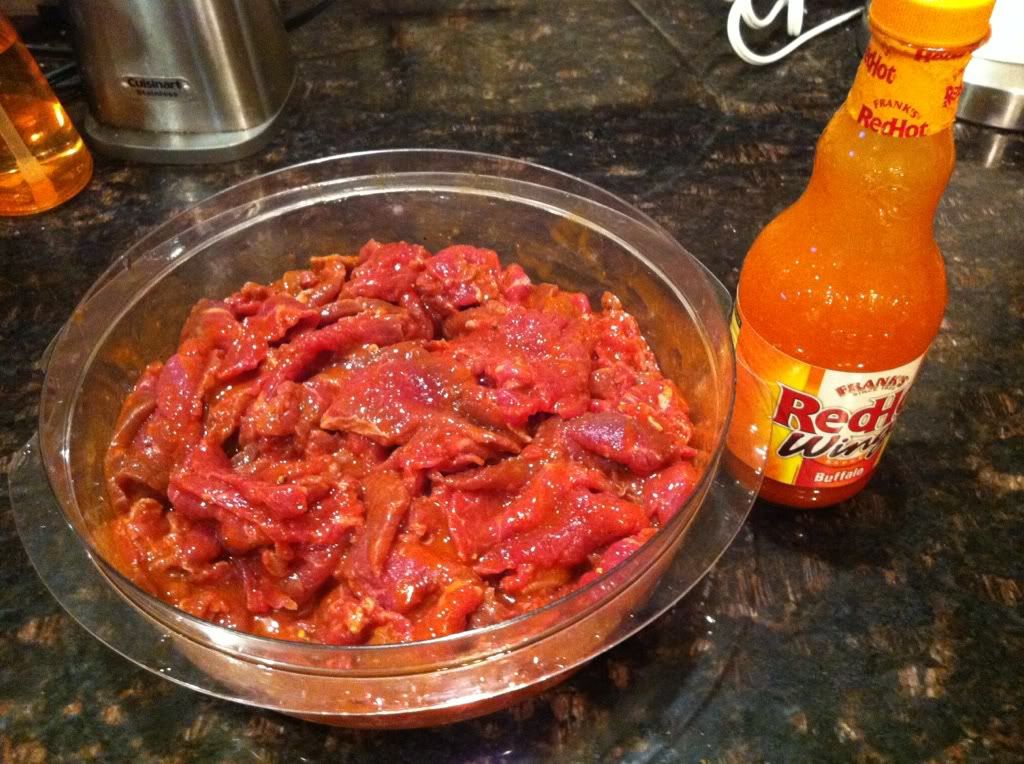
Slice up your meat. I like to get a cookie sheet out and just lay the slices on it. After I get done, I take some sea salt and sprinkle the mess out of it. You want to be able to see it. Now this is optional, I like to add a few splashes of soy sauce and lemon juice. Soy sauce is salty and lemon juice seems to help break down the meat. I also like some cracked black pepper on mine. I put it all in a big bowl and dump half of a bottle of Frank's Wing Sauce on it. You can get this about anywhere now and Amazon.
Very Important - Wear Gloves. I use some spiffy black gloves like they use in the hair salons. Sally's Beauty Supply. Coat the meat until it is red. I mix it around. There is so much vinegar in this sauce that it does seem to break down the meat's toughness. Let it sit in the fridge overnight.
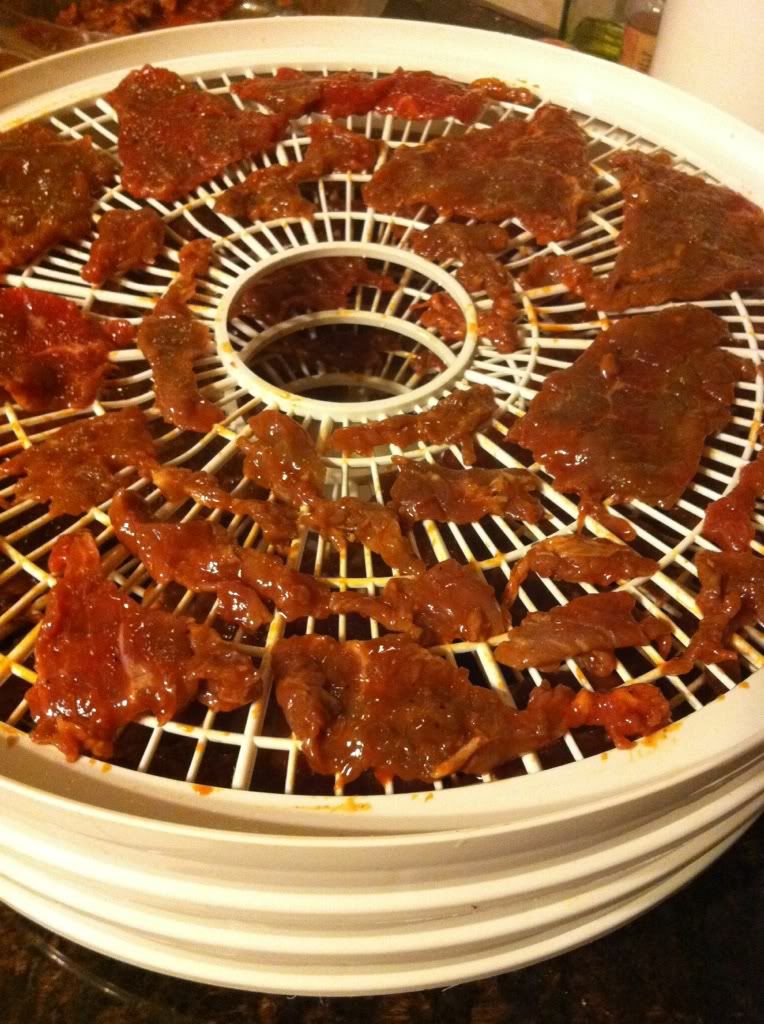
Next morning, put the meat in the dehydrator. Don't let the pieces touch or you won't get as good of air circulation. I am using an older Nesco Food Dehydrator. I realized that I may need to upgrade mine soon because I can't do a whole batch of jerky at a time. It has 4 trays counting the bottom one.
I encourage you not to throw away your small little pieces because they are yummy. If you have little tidbits, just put them in there. They will help you gauge when the meat is getting done without wasting a big piece.
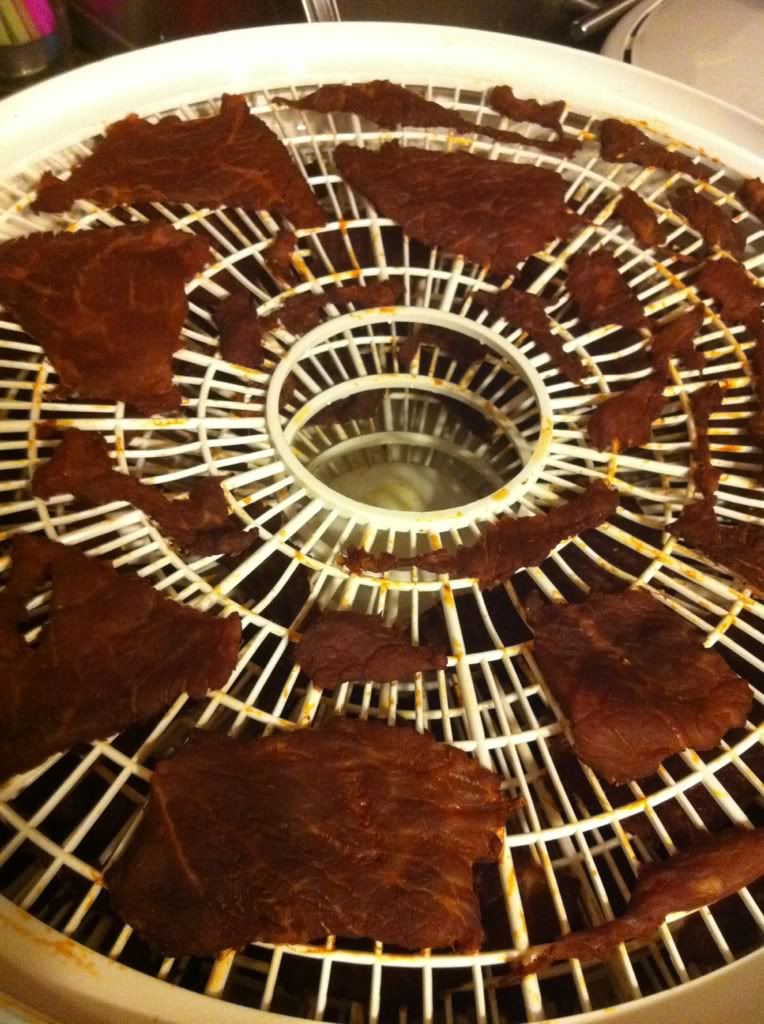
After it has started cooking for a few hours, your house will start smelling nice. After about 4 1/2 hours, you will notice the meat changing drastically. Your small little pieces will be crispy.
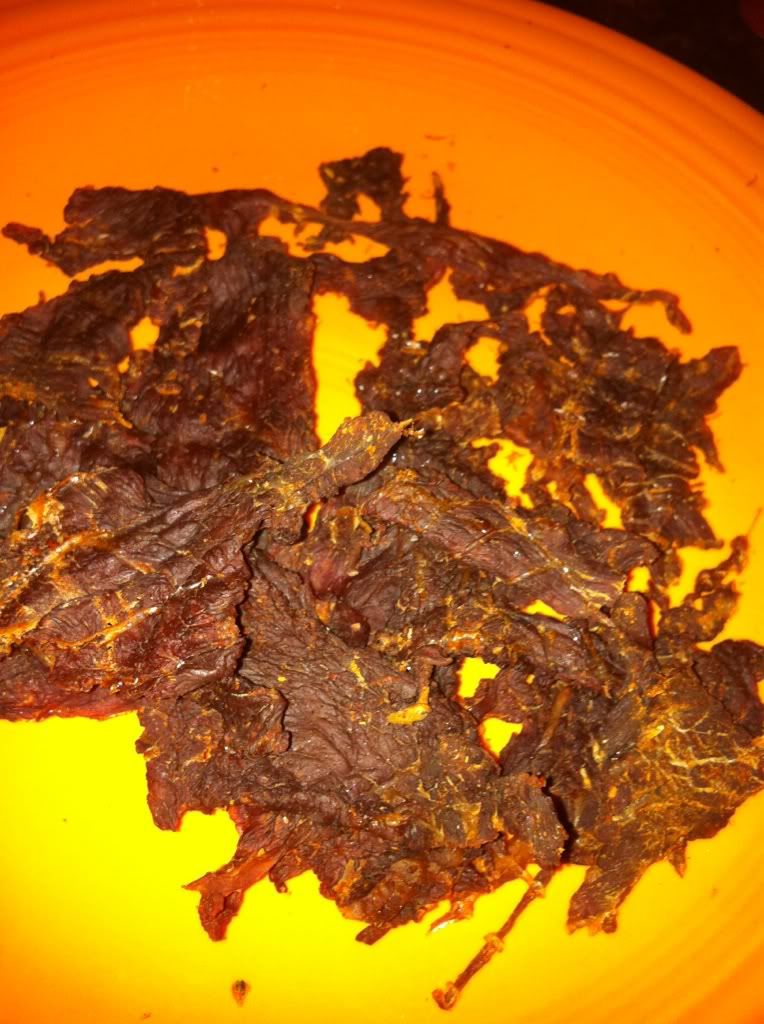
This picture was taken after a few hours. You can see how it started drying nicely.
Your jerky will take anywhere from 6-10 hours to get done depending on how thin you sliced your meat. I check on my jerky every hour after I start taking pieces off. The only real problem we have with making jerky is that I can eat it all as it comes ready. This jerky can be stored on the counter because it is dried!!!
Optional ideas: Before I started cooking with the Frank's sauce, I did it other ways. I never made a bad batch of jerky so just experiment. I sometimes add about 1/4 cup of Dr. Pepper or Coke on the meat. The fizzy helps the meat get tender. If you like your jerky a bit sweet, you can add some brown sugar on the meat when marinating it. Get wild crazy and make some Jerky!
This is a great idea for Holiday Gift Giving.
First, you need to get a roast. Really any roast will do. You need to cut off any major fat so the leaner the better. The last roast we used was a Rump Roast. It is usually around $10.Cut it across the grain if you can. The pieces that are cut across the grain will fall apart more easily. The ones with the grain will be tougher to chew. To each their own.
I cut my meat with a cheaper electric meat slicer that I picked up from Wal-Mart one holiday. You can get it at Amazon as well. It folds up and is pretty easy to use. It is a booger to clean because it does come apart into about 4 pieces. You will find little pieces of meat in cracks, but it does come clean. If you keep your box, it stores nice in a closet.
Slice up your meat. I like to get a cookie sheet out and just lay the slices on it. After I get done, I take some sea salt and sprinkle the mess out of it. You want to be able to see it. Now this is optional, I like to add a few splashes of soy sauce and lemon juice. Soy sauce is salty and lemon juice seems to help break down the meat. I also like some cracked black pepper on mine. I put it all in a big bowl and dump half of a bottle of Frank's Wing Sauce on it. You can get this about anywhere now and Amazon.
Very Important - Wear Gloves. I use some spiffy black gloves like they use in the hair salons. Sally's Beauty Supply. Coat the meat until it is red. I mix it around. There is so much vinegar in this sauce that it does seem to break down the meat's toughness. Let it sit in the fridge overnight.
Next morning, put the meat in the dehydrator. Don't let the pieces touch or you won't get as good of air circulation. I am using an older Nesco Food Dehydrator. I realized that I may need to upgrade mine soon because I can't do a whole batch of jerky at a time. It has 4 trays counting the bottom one.
I encourage you not to throw away your small little pieces because they are yummy. If you have little tidbits, just put them in there. They will help you gauge when the meat is getting done without wasting a big piece.
After it has started cooking for a few hours, your house will start smelling nice. After about 4 1/2 hours, you will notice the meat changing drastically. Your small little pieces will be crispy.
This picture was taken after a few hours. You can see how it started drying nicely.
Your jerky will take anywhere from 6-10 hours to get done depending on how thin you sliced your meat. I check on my jerky every hour after I start taking pieces off. The only real problem we have with making jerky is that I can eat it all as it comes ready. This jerky can be stored on the counter because it is dried!!!
Optional ideas: Before I started cooking with the Frank's sauce, I did it other ways. I never made a bad batch of jerky so just experiment. I sometimes add about 1/4 cup of Dr. Pepper or Coke on the meat. The fizzy helps the meat get tender. If you like your jerky a bit sweet, you can add some brown sugar on the meat when marinating it. Get wild crazy and make some Jerky!
This is a great idea for Holiday Gift Giving.
Sunday, October 02, 2011
Why Store Bought is not always the Best
Picture is not enhanced. iPhone pic.
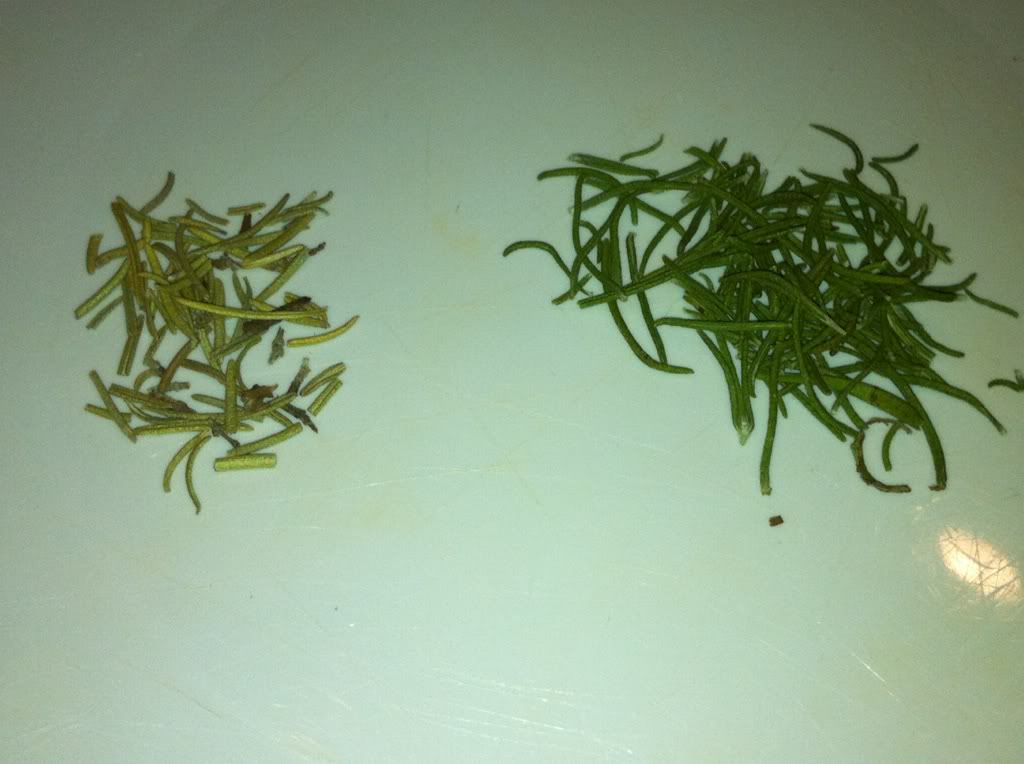
You are looking at a plate that has some dried Rosemary leaves on both sides. The one on the left is Store Bought. That is McCormick's Rosemary Leaves. I admit that it is a few years old, but it was air tight and has not changed that much since I bought it. To the touch, it was dry and brittle and crumbles when you pick it up. I could probably crush it to a powdered state if I gave it a good try.
The pile on the right is my home grown Rosemary. I cut about 4-5 long sprigs of it, tied it in a bunch and hung it upside down inside a well-ventilated (poke holes in it) paper sack. I just clothes-pinned it to a hanger. I hung it up for a few weeks. It was that easy. When your leaves are dried and ready, they will just pop off the stem really easy.
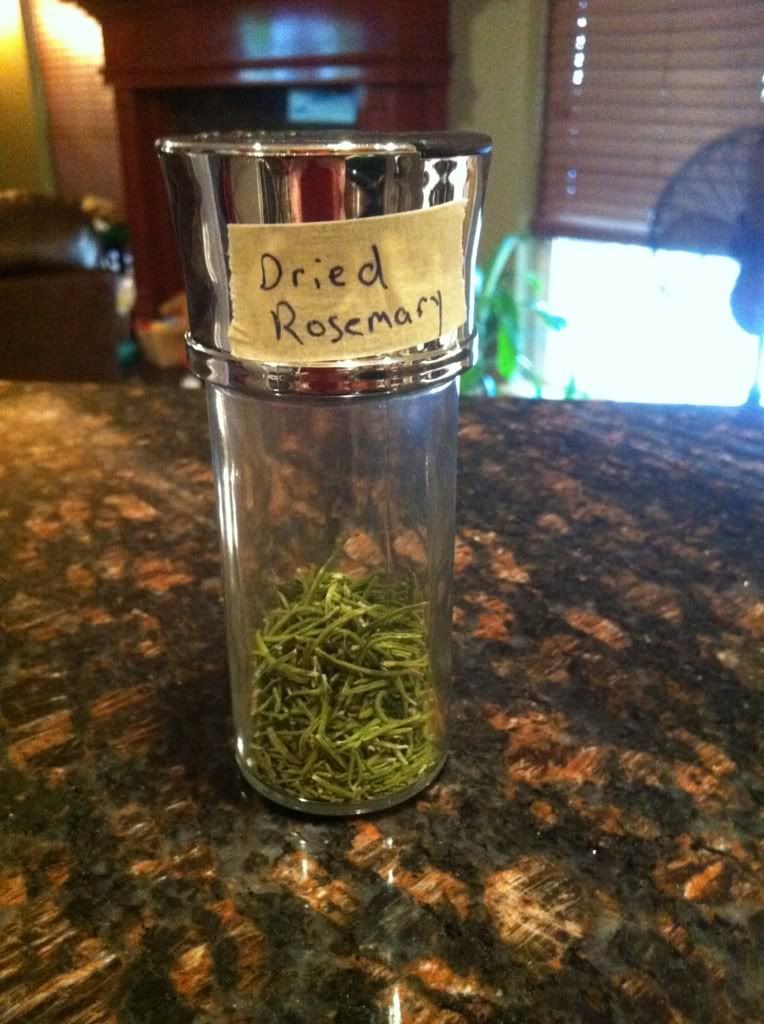
I cannot get over how the color of my leaves are drastically different. I will definitely dry some more soon. This is probably all I will use in a year, anyways. I tasted it, and it tastes more flavorful than the store bought. I got this glass herb jar at Bed Bath and Beyond.
Tuesday, September 20, 2011
Animal Petting
We went to the Four States Fair in Texarkana last night. Baby D enjoyed it a lot. Our favorite part was petting animals.
This is D petting a small deer. It was very soft. There were tons of little goats, a few big tortoises, caged llamas, and a small deer roaming around. I was shocked to see how tame it was. This is D's second experience with goats. He loves them.
Thank you to Becka for sharing these pictures with me.
This is D petting a small deer. It was very soft. There were tons of little goats, a few big tortoises, caged llamas, and a small deer roaming around. I was shocked to see how tame it was. This is D's second experience with goats. He loves them.
Thank you to Becka for sharing these pictures with me.
Tuesday, September 13, 2011
Pressure Cooked Boiled Peanuts
I love Boiled Peanuts. I started eating them when I moved to Georgia for a short time. That is also where I fell in love with Hot Wings. Yumm!
How to? Soak the peanuts in cold water for a little bit before, maybe 20 minutes or so. Drain the raw peanuts, found in your local grocery store. Put them in a pressure cooker. Add a cup of salt if you want it salty and 2/3 cup if less. Cover with water and you can fill about 2/3 full. Cover with lid and bring to pressure. Cook at pressure for at least 45 minutes. Turn it off and depressurize. Let it sit and cool in the water. If you take it out of the water early, they will shrivel up a little and not be as tasty. That will give it more time to soak up the salt. You can tell that the peanuts will sink in the water after they have set for awhile. After a little bit, you can drain them in the sink in a colander.
Storage: I like mine cold, the best. Put them in a Ziploc bag and they will keep in the fridge for 2 weeks. You can also freeze them.
Variations: You can add Tabasco in while cooking if you want them hot.
No Pressure Cooker? No problem. You can boil them on the stove for 2-3 hours.
Monday, September 12, 2011
I soaked the oats
I made this recipe, and it turned out fabulous. I soaked my oatmeal in buttermilk that I made last week when making butter. I used this recipe from this blog below:
Baked Soaked Oatmeal Recipe from Kelly the Kitchen Cop
This is the picture from her site. I did not take any pictures, shame on me!
The only differences I did were that I added some prunes in with my raisins. I also added some peaches with mine along with the apples. I kept the fruit measurement the same. Super yummy!
Baked Soaked Oatmeal Recipe from Kelly the Kitchen Cop
This is the picture from her site. I did not take any pictures, shame on me!
The only differences I did were that I added some prunes in with my raisins. I also added some peaches with mine along with the apples. I kept the fruit measurement the same. Super yummy!
Subscribe to:
Posts (Atom)